EFT stands for Electronic Funds Transfer - it is a process that basically sends a NACHA file to the bank so the bank can automatically deduct payments from customer's accounts (instead of them sending you a check).
![]() This feature is a program 'Add On' and MUST BE turned on by Soft-Pak - please call our Sales department at 888-763-8725 for pricing information.
This feature is a program 'Add On' and MUST BE turned on by Soft-Pak - please call our Sales department at 888-763-8725 for pricing information.
Set up your Company Master - ![]() with YOUR EFT banking information.
with YOUR EFT banking information.

Bank Name - your company's bank name
Dest / Origin # - enter the Destination # and Origin #'s (Tax ID#'s) provided by your bank.
Account Type/ID - enter your bank account type (C for checking S for savings) and account id#.
IRS Employer ID - enter your company's IRS Employer Id (Merchant ID number).
EFT Entry Description - enter the description your customers will see on their bank statements.
Set up Customers for EFT processing in the Customer Profile on the Additional Information tab.

Pre-Note Flag - when a customer is first set up as an EFT customer, the Pre-Note Flag should be set to 'Send Pre-Note' so they will be included in the next pre-note run sent to the bank for verification. Once the Pre-Note file has been processed (option #41 on the Billing Processes menu) the customer's Pre-Note flag is automatically changed to Pre-Note sent. This tells the system that during the Live run, this record can be included.
![]() If the bank sends you information that the customer's data is NOT valid, you must change the Pre-Note flag back to 'Send Pre-Note' and make any necessary changes.
If the bank sends you information that the customer's data is NOT valid, you must change the Pre-Note flag back to 'Send Pre-Note' and make any necessary changes.
Entry Code -This field has to do with how the customer signed up for EFT processing and the type of requirements (documentation, etc) needed for each. The processes that create EFT files will generate separate files for each Entry Code.
Payment Day of Month - You can choose which day of the month your customer's payment will be deducted from their account. If the field is left blank, we assume day 1 when processing the customers payment.
Set up Customers for EFT processing in the Customer Profile on the Additional Information tab under ![]() .
.
![]() Users must have access to the secure information file, in User Security, to set up a customer as an EFT customer.
Users must have access to the secure information file, in User Security, to set up a customer as an EFT customer.

Name - Enter the name listed on the Bank Account the funds will be drawn from.
Account Type/ID - Enter the Account ID, which should be C for checking or S for savings, and the Account ID or number.
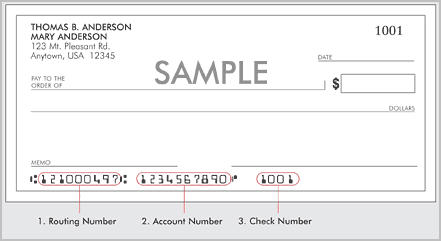
Routing # - Enter the Customer's Bank routing number.

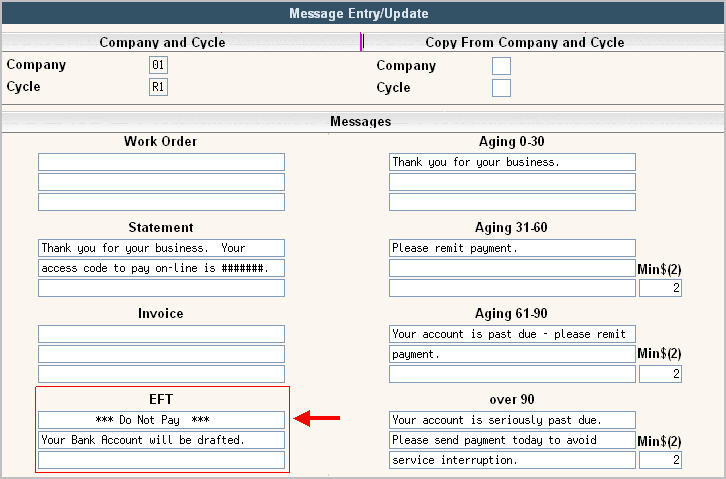
Set Up the Message Master to automatically put a message on statements so the customer does not remit payment.

How it works
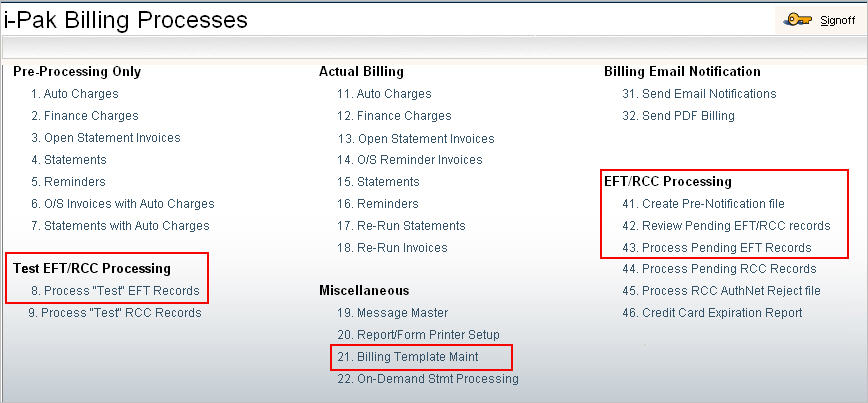
All of the EFT processing options can be found on the BILLING menu.

Pre-Note file
Send a pre-note file to the bank so they can verify the information for the Customer. From the Billing Processes menu select Create Pre-Notification file option # 41.

Select the Companies to be included by clicking on Yes to include.
Select which type of Account to include, either New accounts (ones that have not been previously pre-noted) or All accounts.
![]() No dollar amounts are sent during the Pre-Note file processing and the file will be encrypted.
No dollar amounts are sent during the Pre-Note file processing and the file will be encrypted.
Once the file is created, it must be sent to the Bank - you will need to find out your bank preferences for sending the file. The file is created in the IWSB4xx library (where xx is your Data Set) with a name of EPMMDDS#CO (E=EFT, P=Pre note, MM=month, DD = date, S# = a sequence # and CO = company id). You will need this file name and library name in order to download the file to a PC and transmit to the bank.
During Billing
During the Open Statement Invoice and Statement run a file (BKCC) is updated with possible EFT transactions. These pending transactions can be reviewed and remain encrypted on the server until they are processed.
Review Pending EFT records
From the Billing menu, select option # 42 to Review Pending EFT/RCC records and the following screen will be displayed:

Select by
The top portion of the screen allows you to limit the records displayed. You can choose any of the following:
Sent Flag - Enter Y to only see records that have been sent or leave blank to see All records.
Co - Enter a Company # to limit the records to a single company. Leave blank to see All records.
Cycle - Enter a cycle id to limit the records to a single cycle. Leave blank to see All records.
Type - Enter either EFT to limit to EFT records or RCC to limit to RCC records only. Leave blank to see All records.
Statement Date - Enter a Statement or O/S Invoice Run Date or leave blank to see All records.
The detailed portion of this screen shows the customers included in the file along with their C--Cust#, Cycle, Name, record type (EFT or RCC transaction), Entry Class, Statement/Invoice date, payment day of month, balance due (or invoice total if it's from an Invoice), and if this record has been sent, the date and the user who sent it.
![]() Notes:
Notes:
Process Pending EFT Records
If this is your first time processing EFT transactions or if you have made any major changes (like changing your financial institution, etc.) you should do a 'Test' run first. The options are the same as for Live EFT Processing, but no actual updates occur.
From the Billing Menu, select Process Pending EFT Records (for a 'test' run, select Process "Test" EFT Records option). A continue window will be displayed.

Click on Yes to put a ![]() in the circle to continue, or No to cancel. If you have previously processed EFT transactions and created a Template, you can enter the Template name here. The Template selections will be filled in on the following Company selection screen automatically. Click the
in the circle to continue, or No to cancel. If you have previously processed EFT transactions and created a Template, you can enter the Template name here. The Template selections will be filled in on the following Company selection screen automatically. Click the ![]() to display your choices for Template names.
to display your choices for Template names.
Click or press ![]() to continue. The Company Selection screen will be displayed.
to continue. The Company Selection screen will be displayed.

In the Through Date field, fill in the date you want to process pending EFT transactions through. This refers back to the Payment Day of Month found on the Customers Additional Info tab and will include any pending EFT records with a date through and including this date. So if a customer has a date of 6/15/11 and a pending EFT transaction, they will be included in the file sent to the bank. If a customer has a date of 6/30/11 and a pending EFT transaction, they will NOT be included in this file since the through date is 6/27/11. Type in the date as a number (the / are not needed), or click the Calendar icon ![]() to select the date.
to select the date.
Click on Yes to put a ![]() in the circle to include the company, or No to not include the company. You can click on
in the circle to include the company, or No to not include the company. You can click on ![]() to put a
to put a ![]() in the Yes column for all companies or
in the Yes column for all companies or ![]() to put a
to put a ![]() in the No column for all companies.
in the No column for all companies.
Click the ![]() button or press F5 to accept and continue.
button or press F5 to accept and continue.
This process will:
![]() If you have multiple Entry Classes set up on your accounts, you will generate a separate file for each entry class that exists. If you have multiple companies included in the same run, they will be included in one file as long as the banking institution is the same for all.
If you have multiple Entry Classes set up on your accounts, you will generate a separate file for each entry class that exists. If you have multiple companies included in the same run, they will be included in one file as long as the banking institution is the same for all.
Miscellaneous Notes: