This option is also referred to as i-Pak Automated Letter Generation Module, or even i-Pak to Word.
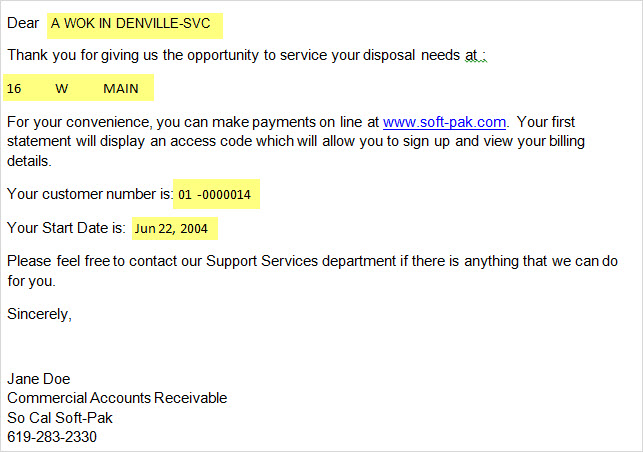
The Word Interface allows i-Pak users to open Word documents which insert data into letters automatically. Letters can be created to utilize data that is on i-Pak’s Customer Profile, Customer A/R History, and Services screens. For example, a user on the Customer Profile screen can open a letter to a customer that will automatically contain address and billing information. While the user remains at that same screen in i-Pak, they can then print out the displayed letter, then continue on to another customer.
![]() Please note, any letter created for an i-Pak screen must be opened when on that screen. Linked letters will not display correctly on other i-Pak screens.
Please note, any letter created for an i-Pak screen must be opened when on that screen. Linked letters will not display correctly on other i-Pak screens.
To begin, you must open up a Word Document on your computer. It can be an existing one that you wish to use, or a New Blank one. Enter in details of your letter, leaving spaces where you want customer specific information to be automatically updated.
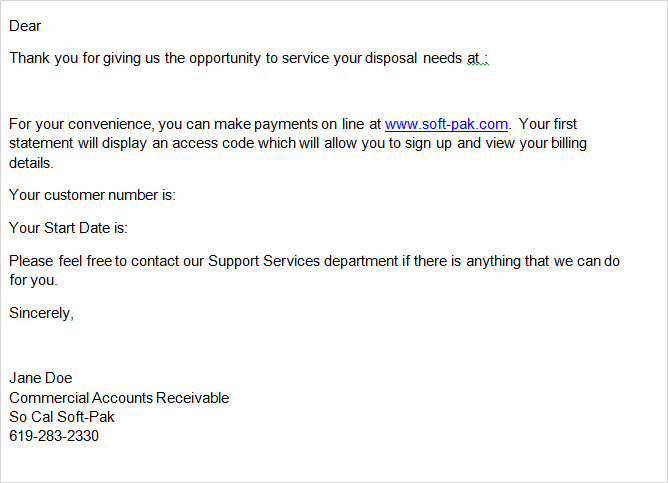
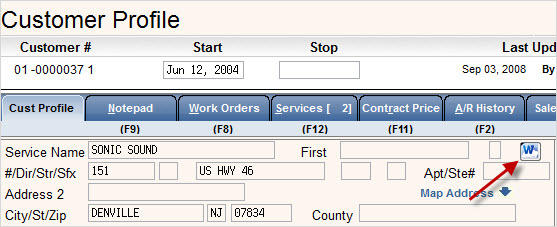
Once you have your base letter set up, then you can begin to add the links. Keeping this document open, go into i-Pak and pull up a customer. This document has a space open for Customer name, Service Address, Customer Number and Start Date. To pull those pieces of information off the Customer Profile, you need to first 'lasso' the fields.
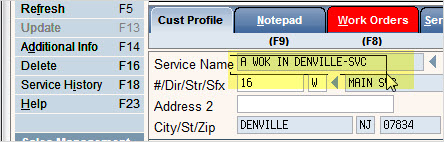
Lasso: First, place your cursor just outside the field that you want to pull into your word document. Then, hold down your left mouse button and drag the cursor over the field. Your screen should display a box around the field that you are trying to 'lasso' as displayed in the highlighted section below. Once you have this box, release your mouse. The box will disappear.
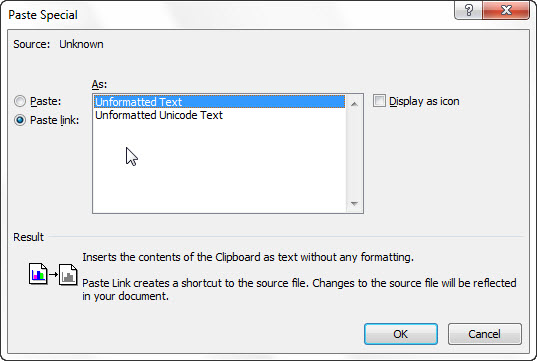
Paste Special: The next step is to Paste the link you just created into your Word Document. To do this, you must go into your Word Document, put your cursor where you want the information to display, then select Paste Options and you should see the option to Paste Special. Select that option.

Paste Link: Once you have selected Paste Special, the following window should appear on your screen.
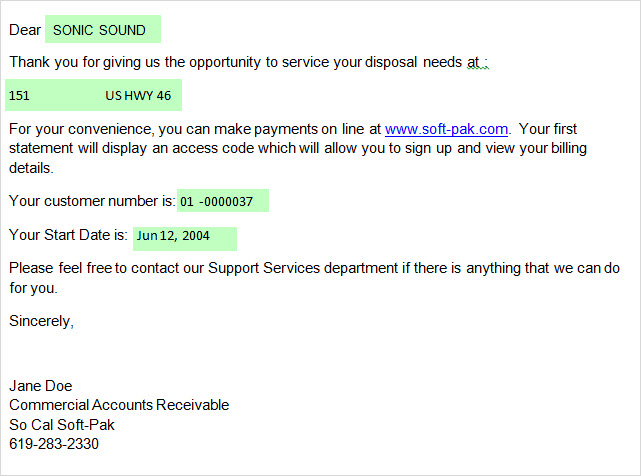
The data in the field that you selected should now be displayed in the word document. All of the fields highlighted below were linked.
![]() Make sure to save this document or you will have to start over!
Make sure to save this document or you will have to start over!
Once it has been saved you can go into another customer and click on the ![]() icon.
icon.
This will provide access to the Word Documents you have already created.
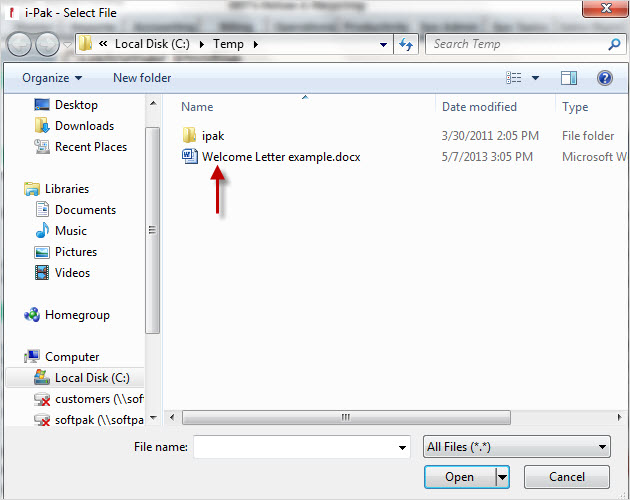
Select the letter you wish to print for this customer and it will default in the information for you.