The Auto Generation of Work Orders by Calendar is an option that will create work orders based on a pre-set daily interval. The interval can either be a set number of calendar days (actual days that have passed) or working days (days determined by your company that often exclude weekends and holidays).
How to Set it Up
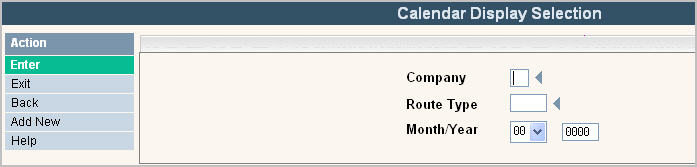
The first step is to create your monthly calendar files. From the Main Menu, go to the System Admin menu and select #51 Calendar File Maintenance. Either the Calendar Display Selection screen or scan screen will be displayed depending on the settings in the system master record. We will begin with the selection screen.
You can search by Company, Route Type and/or Month/Year. The Year is the only required field in order to display the records in the Calendar file.
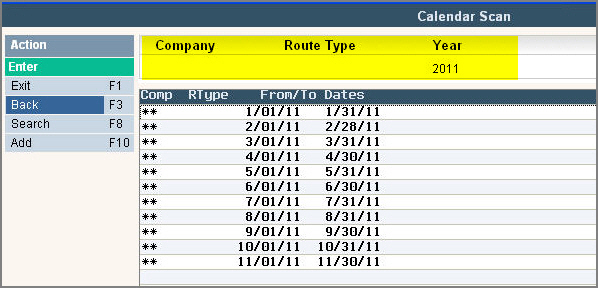
Your search criteria will display at the top of the screen. To make changes select the one you want to update by double clicking on the line item. This will bring up the actual Calendar for you to update.
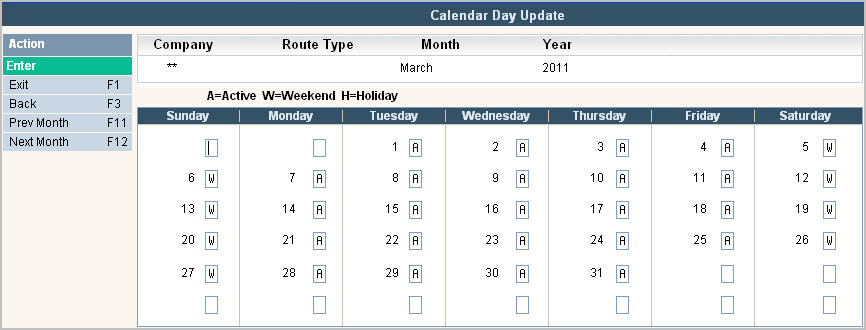
The system will automatically fill in the calendar with defaults of A (Active) for any date that falls on a Monday, Tuesday, Wednesday, Thursday or Friday or W (Weekend) for any date that falls on a Saturday or Sunday. It does not mark anything H for Holiday. You can leave the calendar with the defaults or change it if necessary. For example, if your company works on Saturdays, then you can choose to make Saturday an A for Active so it gets included in the Working Days calculation. Anything marked with an H or W is excluded from the Working Days count.
The easiest way to make additional calendar files is to click ![]() or
or ![]() and the system will automatically create the file defaults for those months as well.
and the system will automatically create the file defaults for those months as well.
To add a new calendar file, select ![]()

Company - The default is company ** which is the system company number. It allows you to have 1 calendar file that can be used for any company in your system. If you need company specific calendars, then enter the individual company id into the field.
Route Type - Enter the route type that the calendar is to be used for. This field can be left blank if you want all route types to use the same calendar file. However, if you have RES type routes that work Monday through Friday, but ROL type routes that work Saturday as well, then you'll want to have a calendar file specific for each route type.
![]() When creating interval work orders and looking for a calendar, the program looks for the exact company and route type calendar setup. I.E. if we have a route that is in company 01 and route type RES, the program will first try to find the calendar for 01/RES and if not found it will then look for the calendar of **/blank
When creating interval work orders and looking for a calendar, the program looks for the exact company and route type calendar setup. I.E. if we have a route that is in company 01 and route type RES, the program will first try to find the calendar for 01/RES and if not found it will then look for the calendar of **/blank
Build Through - Enter the Month and Year that you want the calendar file to be built for.
Press ![]() to accept and the calendar will be built with the defaults as described above.
to accept and the calendar will be built with the defaults as described above.
![]() At this time, you must either Back out (F3) or select Search (F8) to see the new calendar file in the scan screen and select it to update.
At this time, you must either Back out (F3) or select Search (F8) to see the new calendar file in the scan screen and select it to update.
Charge Code Master
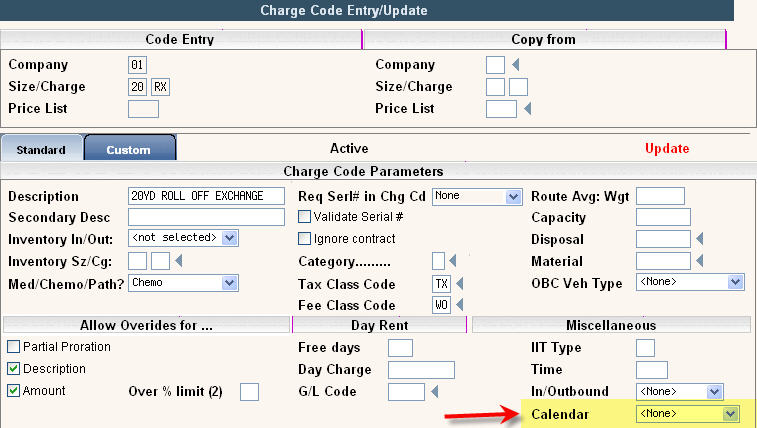
The next step is to update the charge code master. From the System Admin menu, select Master Files and then select Charge Code master.
The charge code master has a field called Calendar that must be updated with the type of interval you will be using.
The options are:
![]()
![]() If the charge code master has None selected, but the size/charge code is used for auto generation of work orders in the services screen, then the programs will use the Calendar days method of determining the creation date of the next work order. There is a flag that can be activated by support to change this to default to working days instead of calendar days. Contact support if you want this activated at your site.
If the charge code master has None selected, but the size/charge code is used for auto generation of work orders in the services screen, then the programs will use the Calendar days method of determining the creation date of the next work order. There is a flag that can be activated by support to change this to default to working days instead of calendar days. Contact support if you want this activated at your site.
Route Master
The final master file to be updated is the Route master. From the System Admin menu, select Master Files menu, then select the Operations Master File menu and from there you should see option #3 to select the Route master.
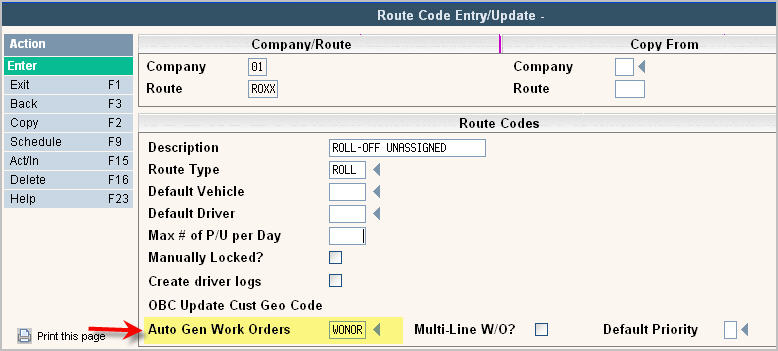
You will need to identify at least one of your routes as an Auto Gen Work Orders route by selecting a valid Auto Gen Work Orders route type. These must be set up in the Route Type master in order to be used here. The valid options are:
WONOR - Creates a work order with a status of "new" but does not create a route list.
WONOP - Creates a work order with a status of "printed" but does not create a route list.
WOPRT - Creates a work order with a status of "new" and creates a route list.
WORTE - Creates a work order with a status of "new" and creates a route list. This type does not force the entry of a Misc 3 code to be entered, thus allowing a regular route to include stops that need work orders automatically generated for them.
![]() All of these Auto Gen WO types will create one work order per quantity entered. So if you have a qty of 3 in the services screen for a 20/EX that you want auto gen work orders created on, you will get 3 work orders, one for each container. The WORTE type has the option of only creating 1 work order, regardless of quantity. Contact Support if you want that feature activated.
All of these Auto Gen WO types will create one work order per quantity entered. So if you have a qty of 3 in the services screen for a 20/EX that you want auto gen work orders created on, you will get 3 work orders, one for each container. The WORTE type has the option of only creating 1 work order, regardless of quantity. Contact Support if you want that feature activated.
Services
You will need to update the services screen for each customer that wishes to have a container serviced based on intervals
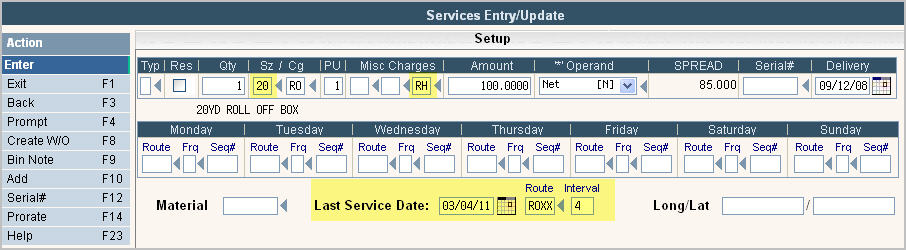
For each bin line that needs a work order created you'll need to enter 4 pieces of information.
The Misc 3 field - in this example we have entered RH. The programs use the Sz of the bin (20) and the Misc 3 field (RH) to update the size/charge code on line 1 of the work order.
![]() Note: All codes entered must be valid sz/cg in the charge code master. In this example, 20/RO, 20/RH and __/RH would all need to be valid charge codes in order to enter them into the services screen.
Note: All codes entered must be valid sz/cg in the charge code master. In this example, 20/RO, 20/RH and __/RH would all need to be valid charge codes in order to enter them into the services screen.
Last Service Date - Enter the last time this container was serviced. This is the beginning date that the system will use when calculating when the next work order will be created. This field will be updated with a new "last service date" each time a work order is automatically created.
Route - Enter the route assigned to the work order. You will usually want this to be a generic route so that you can assign the work order to the appropriate driver on the scheduled day of service.
Interval - Enter the interval, or number of days, that customer is requesting they get serviced. In the example above, the 20 yard Roll Off box is being serviced every 4 days.
How it Works
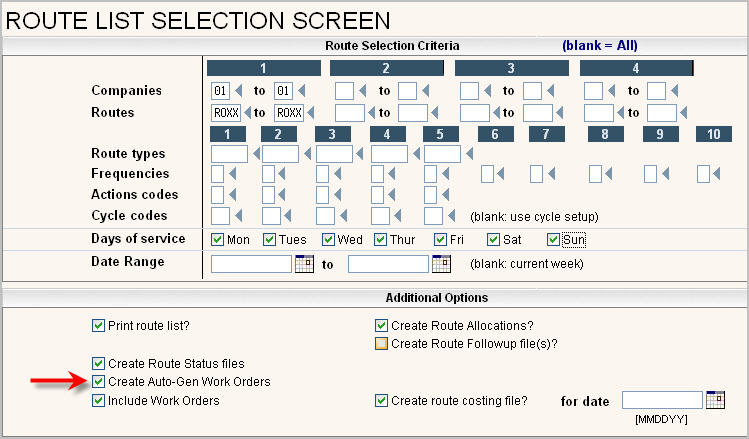
Now that you have all of your master files and customers set up, the rest is easy. All you need to do is select Print Daily Route Lists from the Operations menu.
Once the Route List has been generated, the customers will have new work orders in their scan based on the interval selected. In this example, we used calendar days. 4 days from 3/4/2011 is 3/8/2011.
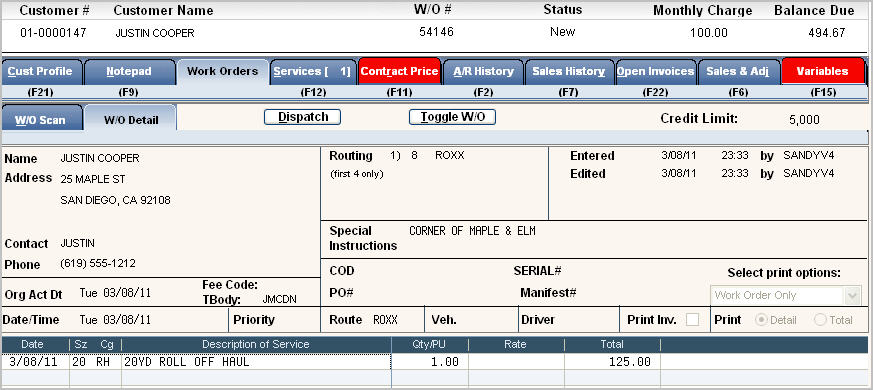
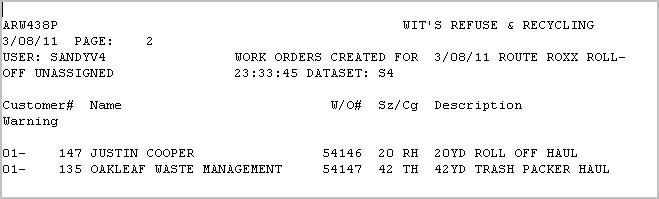
A report will also be generated for any work orders created through Route Lists. The report is called ARW438P and titled Work Orders Created.
![]() If we had selected a calendar type of Working Days in the Charge Code master, then in the example above our next work order would have been on 3/10/2011 since 3/5 & 3/6 are W=Weekend type days.
If we had selected a calendar type of Working Days in the Charge Code master, then in the example above our next work order would have been on 3/10/2011 since 3/5 & 3/6 are W=Weekend type days.
![]() Here are a few miscellaneous notes that you should understand:
Here are a few miscellaneous notes that you should understand:
When using Calendar days to count the interval, weekends and holidays are included in the count but a work order will not get created on those days. The work order will get created on the next A=Active date.
These type of services will be marked with a day of 8 in the RDTL file.
Days of service for interval routes will display as -------.
Multiple work orders will be created if applicable for the date range selected. Ex. My last service date is 3/4/11 and the service is set to an interval of 4 based on Calendar days. On 3/8/11 (Tuesday) I run one weeks worth of route lists. I will get 2 work orders created for this customer. One on 3/8/11(Tues) and one on 3/14/11(Mon - since it skipped the weekend days).
Services on daily intervals can not be updated via Route Manager or used in Temp Route Splits