Priority codes are used in the system to assist Operations and Dispatch identify and prioritize work orders/jobs quickly and efficiently. These codes are entered on the Work Order (header section) and displayed in On-line Dispatching - they can also be added or modified in On Line Dispatching. In addition, Priority Codes can be defaulted in to the Work Order from the Cycle Master.
Examples of codes.
|
* |
Completed |
|
$ |
COD work order |
|
A |
AM service requested |
|
C |
carried over from prior day |
|
P |
PM service requested |
|
R |
Radioed out to driver |
|
1 |
Urgent - high priority |
From the System Administration menu, select Master Files.
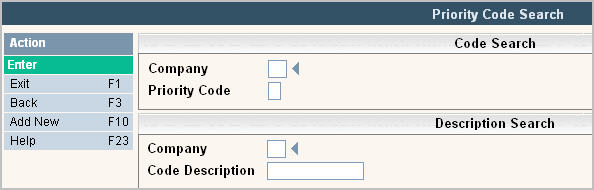
From the Master Files menu, select Priority code. Either the Priority Code search screen or scan screen will be displayed depending on the settings in the system master record. We will begin with the search screen.
To search, use either the code search or description search. You can type in just a company id and press enter and the system will display the Priority Code Scan screen. Select the one you want to view by double clicking on the line item.
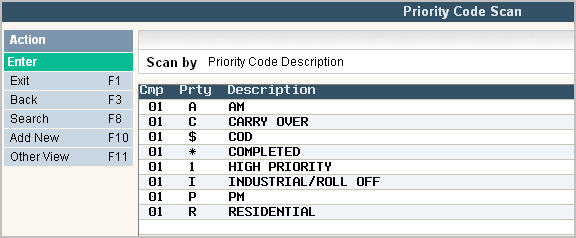
To make changes select the one you want to update by double clicking on the line item. Once you have made any changes click or press ![]() to accept. The system will display the message:
to accept. The system will display the message: ![]() . Click or press
. Click or press ![]() to accept the changes and return to the Priority Code Scan screen.
to accept the changes and return to the Priority Code Scan screen.
To delete a code: from the Priority Code Scan screen select the code by double clicking on the line. Once in the Entry/Update screen click or press ![]() .
.
The system will display a confirmation message on the bottom of the screen: ![]() .
.
![]() There is NO UNDO button, once a code is deleted it is gone.
There is NO UNDO button, once a code is deleted it is gone.
Click or press ![]() to confirm deletion.
to confirm deletion.
To add a new code click or press ![]() and the Priority Code Entry/Update screen will be displayed.
and the Priority Code Entry/Update screen will be displayed.

In the Company field enter your company ID.
In the Priority Code enter the 1 character priority code.
In the Description enter a complete description for the Priority Code.
Once you have filled out the appropriate fields, click or press ![]() to accept. The system will display the message:
to accept. The system will display the message:
![]() . Click or press
. Click or press ![]() to accept the changes and return to the Priority Scan screen.
to accept the changes and return to the Priority Scan screen.