The Message master controls company wide automatic messages that print on several different forms such as; Invoices, Statements and Work Orders (click on the form type to see where messages print on the form).
To access the Message Master, you must have the appropriate security to update Master Files. From the Billing Processes Menu select the Message Master option, OR from the System Administration menu, select the Master Files option then Message Master option #10. The Message Master search screen will be displayed.
In the Code Entry field, type the company id or company id & cycle code for the message you want to create. Click on the ![]() and a blank Message Entry/Update screen will be displayed.
and a blank Message Entry/Update screen will be displayed.
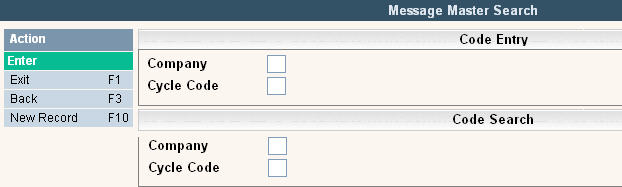
In the Code Search field, type a company or a company & cycle to search for and press ![]() . The Message scan screen will be displayed.
. The Message scan screen will be displayed.
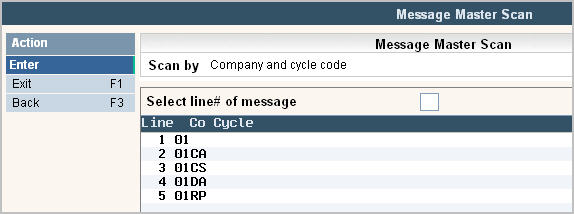
Select the message for the company or company/cycle you want to update by double clicking or typing corresponding line number in the ![]() field and press
field and press ![]() .The Message Entry/Update screen will be displayed.
.The Message Entry/Update screen will be displayed.
In the Message Parameters
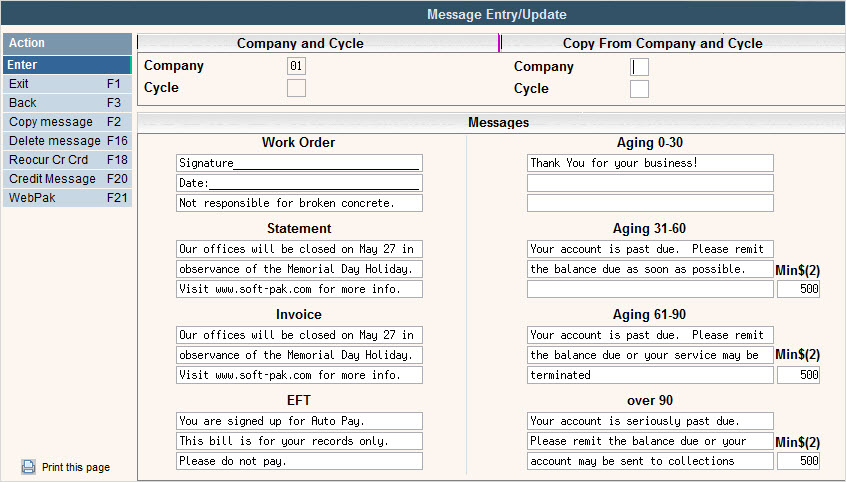
Update the section that corresponds to the type of form you want a message on and type in your message. The message will appear exactly as you type it. The first box will be on top, then the second box, followed by the 3rd box. There are 40 characters for each box.
EFT - if the customer is set up to have payments deducted from their checking or savings accounts automatically (EFT module), enter the message that will print on the invoice or statement.
Aging Messages
These are also know as 'dunning messages' which will print on Statements only. For each aging 'bucket' you can have a different message print out. So if the customer has a balance in the over 90 bucket they will get one message, but a customer who is 'current' will get a different message.
For each aging bucket, enter a message that would pertain to that type of balance. Next to each Aging balance is a field (Min$(2))to enter the minimum balance this customer must have in order to receive this message. This way you are not sending an 'over 90' message to someone who may have only $1 in the 90 day column.
Examples:
Thank you for your prompt payments (for 0-30)
Your account is past due, please remit payment (for 31-60)
Your account is SERIOUSLY past due, please call us to avoid service delays (for 61-90)
Your account has been turned over to collections (over 90)
Reocur Cr Crd F18 - if the customer is set up to have payments automatically charged to their credit card, enter the message that will print on the invoice or statement. Click or press ![]() (F18) to display the message boxes for reoccurring credit cards.
(F18) to display the message boxes for reoccurring credit cards.
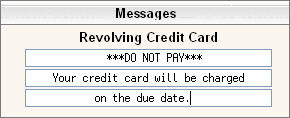
Credit Message F20 - if a customer has a credit balance and credit balance statements are generated enter a message that will print. Click or press ![]() (F20) to display the message screen.
(F20) to display the message screen.

WebPak F21 - if you are have purchased WebPak then this section of the message master will be helpful to you.

Non Web-Pak Customers - This is the message that you want to print on the Statements and Invoices to let the customers know they can sign up on line and what their access code is. In order for the access code to print on the bills, you must enter 7 # signs into the message master as shown above. The # signs will be replaced with the customers actual access code on their bill.
Existing Web-Pak Customers - This is the message that you want to print on the Statements and Invoices for customers that have already signed up for Web-Pak. Once they have signed up, they no longer need their access code. A gentle reminder to visit your website and pay online should be perfect.
Once you have your messages typed in press ![]() to accept. You will get the following message:
to accept. You will get the following message:![]() . Press
. Press ![]() to accept. You will return to the Message Master Search screen. Click
to accept. You will return to the Message Master Search screen. Click ![]() to exit and return to the menu.
to exit and return to the menu.