Once you have toggled all your work orders, you are ready to edit and post.
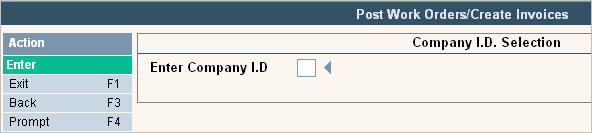
From the Accounting Menu, select the Post WO's/Create Invoices Batch option #28. The Post Work Orders / Create Invoices Company Selection window will be displayed.
Enter the company ID to post and click or press ![]() . A confirmation window will be displayed.
. A confirmation window will be displayed.
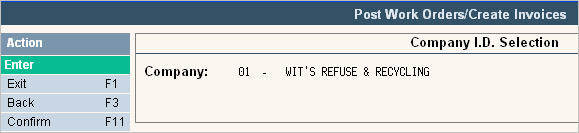
Verify it is the company you want to post and click or press ![]() . The cycle selection screen will be displayed.
. The cycle selection screen will be displayed.
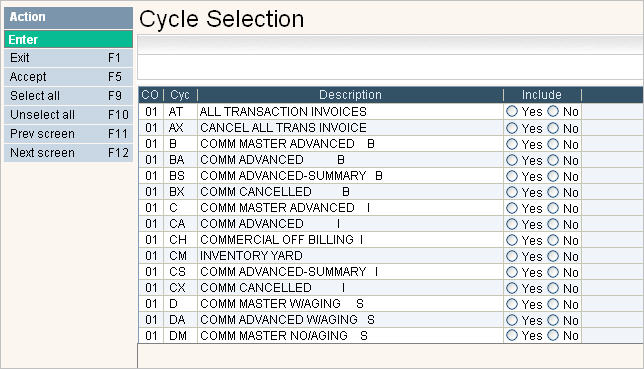
Select the specific cycles you want to Include by clicking on the Yes to put a ![]() in the circle. To select ALL cycles (most common), click or press
in the circle. To select ALL cycles (most common), click or press ![]() . A quick way to select only 1 or 2 cycles is to select
. A quick way to select only 1 or 2 cycles is to select ![]() so that all cycles are checked NO, then you can just change a few to Yes
so that all cycles are checked NO, then you can just change a few to Yes ![]() manually.
manually.
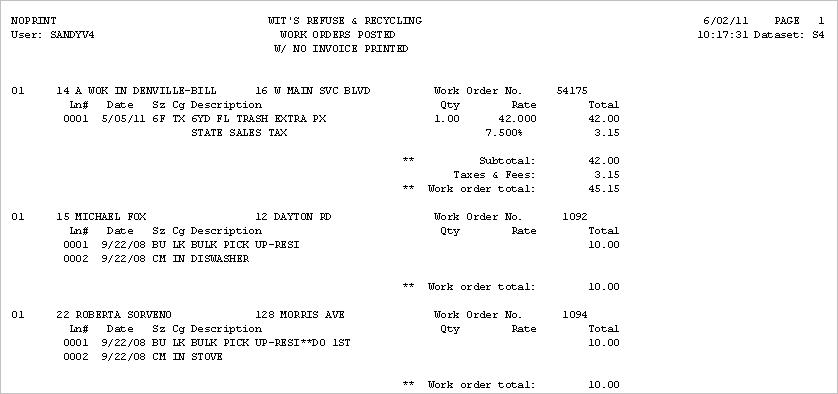
Once all the selections are made, click or press ![]() to continue. The system will generate a listing of all work orders included in this post (called NOPRINT). For work orders that are set up to produce invoices, Invoices will be generated.
to continue. The system will generate a listing of all work orders included in this post (called NOPRINT). For work orders that are set up to produce invoices, Invoices will be generated.
Review the listing and/or Invoices carefully before answering the following question.
![]() You may want to answer No the first time to give yourself a chance to review the Report and Invoices and there may be many.
You may want to answer No the first time to give yourself a chance to review the Report and Invoices and there may be many.

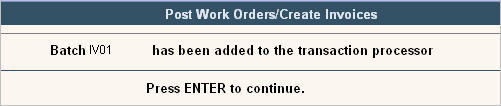
If you are ready to post, click on Yes to put a ![]() in the circle. The system will display a message that your batch has been added to the Transaction Processor.
in the circle. The system will display a message that your batch has been added to the Transaction Processor.
Reports
The system will generate a listing of all work orders included in this post (called NOPRINT) when work orders are posted. Any work orders that are set up to "print invoice=Yes", an Invoice will be generated. The work orders that print to invoices are NOT recorded on the NOPRINT report.