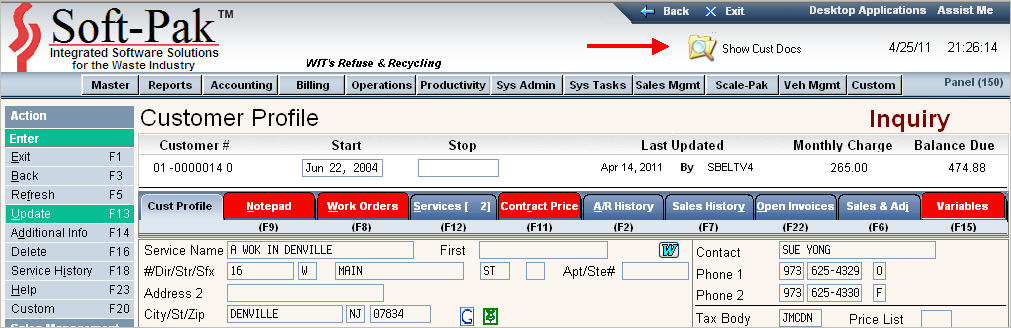
Customer#: ![]() The 2 character company id and 7 digit customer number followed by a check digit field after the space. This information can be created by i-Pak or manually entered if your company master is set to "Allow keyed cust#".
The 2 character company id and 7 digit customer number followed by a check digit field after the space. This information can be created by i-Pak or manually entered if your company master is set to "Allow keyed cust#".
![]() The check digit is used during Balance Forward Cash Receipts to assist in preventing keying errors.
The check digit is used during Balance Forward Cash Receipts to assist in preventing keying errors.
'Start' date:  Enter the date the service started or the date they signed the contract. The date can be entered using the Calendar icon
 ![]() , or by simply keying in the date as a number - the system will format the field accordingly. The date you decided to use may depend on your own company's procedures, policies and needs.
, or by simply keying in the date as a number - the system will format the field accordingly. The date you decided to use may depend on your own company's procedures, policies and needs. ![]() If the customer's start date has NOT been reached, the customer will NOT print on a route list.
If the customer's start date has NOT been reached, the customer will NOT print on a route list.
'Stop' Date:  If the customer is in a cancelled cycle, the stop date should be filled in.
 ![]() This field controls if a customer is listed on a route sheet - if the stop date is in the past, the customer will NOT print on the route list unless using a special 'stop' action code. The stop date can also be used in reporting to see how many accounts have cancelled in a specific time frame. You will be required to enter a stop date upon changing the customer to a cancelled cycle (either manually or through prorations) if the company master is set to "Force Stop Date Entry".
This field controls if a customer is listed on a route sheet - if the stop date is in the past, the customer will NOT print on the route list unless using a special 'stop' action code. The stop date can also be used in reporting to see how many accounts have cancelled in a specific time frame. You will be required to enter a stop date upon changing the customer to a cancelled cycle (either manually or through prorations) if the company master is set to "Force Stop Date Entry".
Last Updated:  This field displays the date the profile was last changed/updated and the User ID who changed it.
Monthly Charge: ![]() Display field - the total Monthly Charge for the account (before taxes and fees).
Display field - the total Monthly Charge for the account (before taxes and fees).
Balance Due:  Display field - the total Balance Due for the account.
Service Information

Service Name: The first field is for a Customer Name (non residential) or 'Last Name' (residential), the second field is for the 'First Name'.
For residential customers or homeowners that are getting a temporary Roll Off container, enter the last name in the first box and the first name in the second box. For all other types of customers enter the name of the Customer or the name of the Service location, if different from the billing name, in the First Box. For example, the service location name might be 'Riverside Apartments', but the Bill should go to 'A Roof Overhead Management Company'; or the service location may be 'Blockbuster Video #123' but the Bill goes to 'Oakleaf Waste Management'. For Roll Off customers, you might use the service name field as a 'job site number or a Lot #, but the bill goes to 'Wizard Construction'. Since this is a field you can search on that is different than the Billing Name, you can also use your own company guidelines as far as what to put in this field. The Service Name field is printed on Bills (Invoices & Statements), Route Lists, Work Orders, as well as some Reports.
![]() : Then Entry Box/Field after the Service First name and before the Word Icon is a User Defined field to store whatever information might be useful to your company. It exists next to the Billing Name and Service Name. Some examples for use are: Middle Initial, O for Owner vs T for Tenant, S for Shared Container between multiple accounts. This field is informational only and is not used in other areas of i-Pak. It will display on the variable reports if entered.
: Then Entry Box/Field after the Service First name and before the Word Icon is a User Defined field to store whatever information might be useful to your company. It exists next to the Billing Name and Service Name. Some examples for use are: Middle Initial, O for Owner vs T for Tenant, S for Shared Container between multiple accounts. This field is informational only and is not used in other areas of i-Pak. It will display on the variable reports if entered.
![]() : This icon will bring up a link to your saved documents. You have the option of creating Word Documents with 'links' in them that will pull customer specific data into the letter when you open it up from the account. This is a handy tool for quickly generating one-off letters for past due balances, routing changes, welcome letters, or whatever else your company needs. Click here to find out more about the Word Interface.
: This icon will bring up a link to your saved documents. You have the option of creating Word Documents with 'links' in them that will pull customer specific data into the letter when you open it up from the account. This is a handy tool for quickly generating one-off letters for past due balances, routing changes, welcome letters, or whatever else your company needs. Click here to find out more about the Word Interface.
#/Dir/Str/Sfx : This is the first line of the Service Address. As you can see, each portion of the address is separated into its components. If you do not have any information available for one of the components, simply leave blank; however, at the very least, something must be entered in to the Str (street) field as this is a required field:
#: the street or house number of the address
Dir: the directional for the street such as North, South, NorthEast, SouthWest, etc. This field has a 'standard' table behind it, so you must use one of the abbreviations in the table, or just use blank. To see a list of your choices, simply click on the blue arrow ![]() or press the F4 key on your keyboard. Select your choice by moving your cursor over the line you want and 'double clicking'.
or press the F4 key on your keyboard. Select your choice by moving your cursor over the line you want and 'double clicking'.
Str: the street name (Maple, Main, Poppy Seed, Ocean Surf, etc.)
Sfx: the suffix or abbreviation for the street. This field has a file (table of standards) behind it to ensure consistent data entry. It is based on the Post Office standards, and has just about every abbreviation you may need; however, abbreviations can be added to this file if there is one in your area that is not listed. To see a list of your choices, click on ![]() or press F4 to prompt. Click on
or press F4 to prompt. Click on ![]() and
and ![]() or your Page Down and Page Up keys to move down and up through the file until you find the suffix/abbreviation you need. Select your choice by moving your cursor over the line you want and 'double clicking'.
or your Page Down and Page Up keys to move down and up through the file until you find the suffix/abbreviation you need. Select your choice by moving your cursor over the line you want and 'double clicking'.
![]() If there are any changes or additions that are needed, please see your System Administrator. If you ARE the System Administrator, please click here to link to the Street Suffix File documentation.
If there are any changes or additions that are needed, please see your System Administrator. If you ARE the System Administrator, please click here to link to the Street Suffix File documentation.
Blank box between Sfx and Apt/Ste#: this is for a 2nd directional abbreviation for the street. In some parts of the country the address may have a directional before AND after the street name. For example: 1 N Main St SW. This field has a 'standard' table behind it, so you must use one of the abbreviations in the table, or just use blank. To see a list of your choices, simply click on the blue arrow ![]() or press the F4 key on your keyboard. Select your choice by moving your cursor over the line you want and 'double clicking'.
or press the F4 key on your keyboard. Select your choice by moving your cursor over the line you want and 'double clicking'.
Apt/Ste#: This field is used as additional information for the 1st service address; such as an apartment number, space number, suite number, etc. It will be displayed on the customer service scan screen to aide in customer look up. If there are 50 units at a property (like a mobile home park for example) and they are all the same address, if the space number is entered in this field - it will be shown clearly on the scan screen.
Address 2: This is for an additional address line such as; Building number, cross street, etc. This field will also print on Bills, Route Lists, Work Orders and Reports. If left blank, a blank line will NOT appear.
![]() : This option allows you access to Google Maps, Bing Maps and (if installed) Microsoft MapPoint
: This option allows you access to Google Maps, Bing Maps and (if installed) Microsoft MapPoint![]() . When you click on this button it will display your choices. When you click on one of the options, you will be brought into the mapping software and the service address will be defaulted into the search criteria and displayed on the map if it's a valid address.
. When you click on this button it will display your choices. When you click on one of the options, you will be brought into the mapping software and the service address will be defaulted into the search criteria and displayed on the map if it's a valid address.
![]() If you are using the Microsoft MapPoint
If you are using the Microsoft MapPoint![]() interface (indicated by a
interface (indicated by a ![]() under the Map Address section), please keep in mind the system will use the following field (#/Dir/Str/Sfx) to send to MapPoint
under the Map Address section), please keep in mind the system will use the following field (#/Dir/Str/Sfx) to send to MapPoint![]() , so you may want to key the address so Microsoft MapPoint
, so you may want to key the address so Microsoft MapPoint![]() will find it. For example, if the location is Lexington St and 5th Ave - use the 'major' street in the first address line and the secondary street in the Service Addr2 line. Click here for additional information on Microsoft MapPoint
will find it. For example, if the location is Lexington St and 5th Ave - use the 'major' street in the first address line and the secondary street in the Service Addr2 line. Click here for additional information on Microsoft MapPoint![]()
City/St/Zip: This is the City, State and Zip Code field. If you do NOT have Zip Code Validation turned on, you will need to key in the City, State and Zip code; however, zip code can be left blank. If you have the Zip Code Validation turned ON, you can type the city and state and the zip code will automatically be entered; or you can skip the city and state, type in the zip code and the system will fill in the city and state. If there are duplicate matches, the system will display a Zip Code Selection screen with your choices. Select your choice by moving your cursor over the line you want and 'double click', the city, state and zip will be inserted.
![]() What is Zip Code Validation. It is a feature for both the Service City/State/Zip and the Billing City/State/Zip using a Zip Code Master file to validate or check that the Zip code entered matches the City & State on file; or the reverse, that the City and State entered match the Zip Code on file. In addition, the Zip Code file can be used to automatically populate the Area Code (for the first phone number), Tax Body, Price List and default W/O Route. If the system finds multiple cities for the zip code entered or multiple zip codes for the city/state entered, a pop up window will be displayed listing possible choices. If a city or zip is missing or if the recommended city/state/zip does not match the approved Post Office city/state/zip (verify by checking www.usps.com); then your System Administrator can modify the Zip Code master. If you ARE the System Administrator, click here to see where to activate Zip Code validation.
What is Zip Code Validation. It is a feature for both the Service City/State/Zip and the Billing City/State/Zip using a Zip Code Master file to validate or check that the Zip code entered matches the City & State on file; or the reverse, that the City and State entered match the Zip Code on file. In addition, the Zip Code file can be used to automatically populate the Area Code (for the first phone number), Tax Body, Price List and default W/O Route. If the system finds multiple cities for the zip code entered or multiple zip codes for the city/state entered, a pop up window will be displayed listing possible choices. If a city or zip is missing or if the recommended city/state/zip does not match the approved Post Office city/state/zip (verify by checking www.usps.com); then your System Administrator can modify the Zip Code master. If you ARE the System Administrator, click here to see where to activate Zip Code validation.
County: This is the County that this service address resides in. This is not a mandatory field but can be beneficial to enter for reporting purposes.
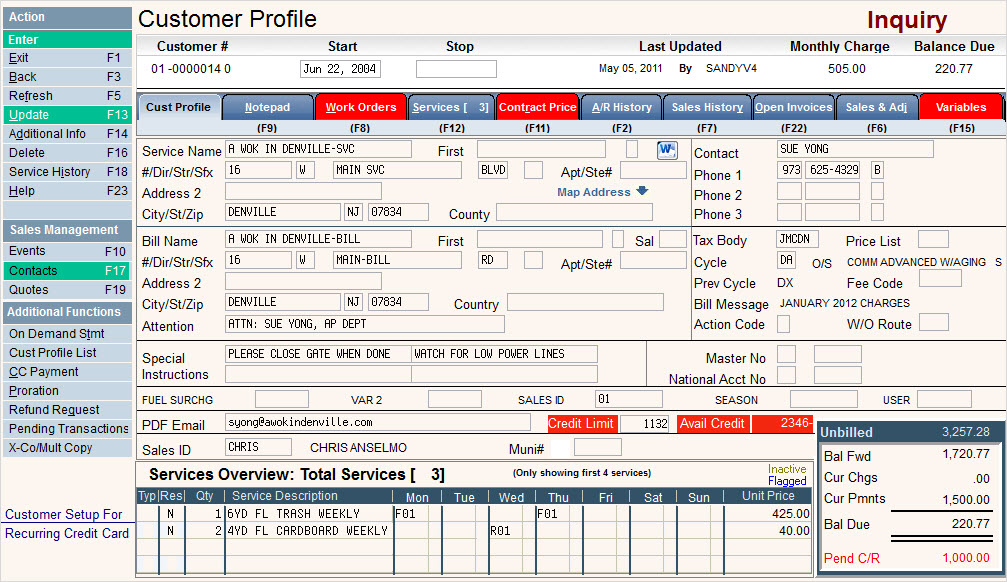
Billing Information
![]() If the Billing Information is the same as the Service Information, you do NOT need to retype the information. Once you press Enter and there are no errors, the system will copy the Service Information in to the corresponding Billing fields.
If the Billing Information is the same as the Service Information, you do NOT need to retype the information. Once you press Enter and there are no errors, the system will copy the Service Information in to the corresponding Billing fields.
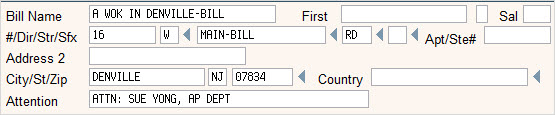
Bill Name: The first field is for the Customer name (non residential) or 'Last Name' (for residential) The second field is for the 'First Name'.
For residential customers or homeowners that are getting a temporary Roll Off container, enter the last name in the first box and the first name in the second box. For all other types of customers enter the name of the Customer if different from the service name, in the first box. For example, the service location name might be 'Riverside Apartments', but the Bill should go to 'A Roof Overhead Management Company'; or the service location may be 'Blockbuster Video #123' but the Bill goes to 'Oakleaf Waste Management'. For Roll Off customers, you might use the service name field as a 'job site number or a Lot #, but the bill goes to 'Wizard Construction'. Since this is a field you can search on that is different than the Service Name, you can also use your own company guidelines as far as what to put in this field. The Billing Name field is printed on Bills (Invoices & Statements), Route Lists, Work Orders, Scale tickets, as well as some Reports. If the bill needs to be sent to the attention of someone, enter the information in the Attention box.
![]() : Then Entry Box/Field after the Billing First name and before the Salutation is a User Defined field to store whatever information might be useful to your company. It exists next to the Billing Name and Service Name. Some examples for use are: Middle Initial, O for Owner vs T for Tenant, S for Shared Container between multiple accounts. This field is informational only and is not used in other areas of i-Pak. It will display on the variable reports if entered.
: Then Entry Box/Field after the Billing First name and before the Salutation is a User Defined field to store whatever information might be useful to your company. It exists next to the Billing Name and Service Name. Some examples for use are: Middle Initial, O for Owner vs T for Tenant, S for Shared Container between multiple accounts. This field is informational only and is not used in other areas of i-Pak. It will display on the variable reports if entered.
SAL: This field is for the Billing Name Salutation.
#/Dir/Str/Sfx: This is the first line of the Billing Address. As you can see, each portion of the address is separated into its components, if you do not have any information available for one of the components, simply leave blank; however, at the very least, something must be entered in to the Str (street) field as this is a required field. For Post Office
# = the street or house number of the address
Dir = the directional for the street; North, South, NorthEast, SouthWest, etc. This field has a 'standard' table behind it, so you must use one of the abbreviations in the table, or just use blank. To see a list of your choices, simply click on the blue arrow ![]() or press the F4 key on your keyboard. Select your choice by moving your cursor over the line you want and 'double clicking'.
or press the F4 key on your keyboard. Select your choice by moving your cursor over the line you want and 'double clicking'.
Str - the street name (Maple, Main, Poppy Seed, Ocean Surf, etc.)
Sfx - the suffix or abbreviation for the street. This field has a file (table of standards) behind it to ensure consistent data entry. It is based on the Post Office standards, and has just about every abbreviation you may need; however, abbreviations can be added to this file if there is one in your area that is not listed. To see a list of your choices, click on ![]() or press F4 to prompt. Click on
or press F4 to prompt. Click on ![]() and
and ![]() or your Page Down and Page Up keys to move down and up through the file until you find the suffix/abbreviation you need. Select your choice by moving your cursor over the line you want and 'double clicking'.
or your Page Down and Page Up keys to move down and up through the file until you find the suffix/abbreviation you need. Select your choice by moving your cursor over the line you want and 'double clicking'.
![]() If there are any changes or additions that are needed, please see your System Administrator. If you ARE the System Administrator, please click here to link to the Street Suffix File documentation.
If there are any changes or additions that are needed, please see your System Administrator. If you ARE the System Administrator, please click here to link to the Street Suffix File documentation.
Blank box between Sfx and Apt/Ste#: this is for a 2nd directional abbreviation for the street. In some parts of the country the address may have a directional before AND after the street name. For example: 1 N Main St SW. This field has a 'standard' table behind it, so you must use one of the abbreviations in the table, or just use blank. To see a list of your choices, simply click on the blue arrow ![]() or press the F4 key on your keyboard. Select your choice by moving your cursor over the line you want and 'double clicking'.
or press the F4 key on your keyboard. Select your choice by moving your cursor over the line you want and 'double clicking'.
Apt/Ste#: This field is used as additional information for the 1st service address; such as an apartment number, space number, suite number, etc. It will be displayed on the customer service scan screen to aide in customer look up. If there are 50 units at a property (like a mobile home park for example) and they are all the same address, if the space number is entered in this field - it will be shown clearly on the scan screen.
Address 2: This is for an additional address line such as; Building number, cross street, Apartment/Unit number, etc. This field will also print on Bills, Route Lists, Work Orders and Reports. If left blank, a blank line will NOT appear.
City/St/Zip: This is the City, State and Zip Code field. If you do NOT have Zip Code Validation turned on, you will need to key in the City, State and Zip code; however, zip code can be left blank. If you have the Zip Code Validation turned ON, you can type the city and state and the zip code will automatically be entered; or you can skip the city and state, type in the zip code and the system will fill in the city and state. If there are duplicate matches, the system will display a Zip Code Selection screen with your choices. Select your choice by moving your cursor over the line you want and 'double click', the city, state and zip will be inserted.
![]() What is Zip Code Validation. It is a feature for both the Service City/State/Zip and the Billing City/State/Zip using a Zip Code Master file to validate or check that the Zip code entered matches the City & State on file; or the reverse, that the City and State entered match the Zip Code on file. In addition, the Zip Code file can be used to automatically populate the Area Code (for the first phone number), Tax Body, Price List and default W/O Route. If the system finds multiple cities for the zip code entered or multiple zip codes for the city/state entered, a pop up window will be displayed listing possible choices. If a city or zip is missing or if the recommended city/state/zip does not match the approved Post Office city/state/zip (verify by checking www.usps.com); then your System Administrator can modify the Zip Code master. If you ARE the System Administrator, click here to see where to activate Zip Code validation.
What is Zip Code Validation. It is a feature for both the Service City/State/Zip and the Billing City/State/Zip using a Zip Code Master file to validate or check that the Zip code entered matches the City & State on file; or the reverse, that the City and State entered match the Zip Code on file. In addition, the Zip Code file can be used to automatically populate the Area Code (for the first phone number), Tax Body, Price List and default W/O Route. If the system finds multiple cities for the zip code entered or multiple zip codes for the city/state entered, a pop up window will be displayed listing possible choices. If a city or zip is missing or if the recommended city/state/zip does not match the approved Post Office city/state/zip (verify by checking www.usps.com); then your System Administrator can modify the Zip Code master. If you ARE the System Administrator, click here to see where to activate Zip Code validation.
Country: If the bill is being mailed out of the United States, enter the country or country abbreviation here. The system will compare the city, state and zip to the country in the State/Country Code file for validation.
Attention: If the bill should go to the attention of a particular person or department at a company or if there should be a second name on the account, enter the information here. For example: Attn: Accounts Payable, C/O John Pix Estate, etc. This information will print ABOVE the billing name on all types of bills (statements, invoices, mailers, postcards, reminders, etc). ![]() The word 'attention' or 'attn' will NOT print unless entered in the field.
The word 'attention' or 'attn' will NOT print unless entered in the field.
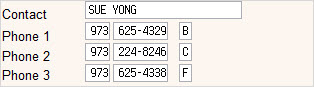
Contact: This field is for Contact information. Type in the name and extension of a contact person, you may also want to include the department. This field will be mandatory if your company master is set as "Contact Required".
Phone 1 -type in the area code and phone number for the first contact phone number. You do NOT need to key in the '-' the system will format the field accordingly. In some cases, the area code may be filled in automatically (defaults from the Company Master or the Zip Code Master). Keep in mind, this field is used as a Search option on the Customer Search screen, and it will print on Work Orders/Logs, so you should decide as a company which phone number (billing, service, etc) to put in this field. In addition, there is a one character box to the right of the phone number - this is for the 'phone type'. Key in a letter to illustrate the type of phone it is - these are not 'standard' in the system (or table driven), so you can choose what to use. For example: 'B' for billing, 'S' for service, 'O' for office, 'W' for work, 'C' for cell, etc. This field will be mandatory if your system master is set as "Require Customer Phone Number".
Phone 2 -type in the area code and phone number for a second contact phone number. This field is the same as Phone 1, just an additional contact number. You may want to use this for a fax number or a site location number.
Phone 3 -type in the area code and phone number for a third contact phone number. This field is the same as Phone 1 and 2, just an additional contact number.
![]() There are additional fields in the system to put contact information if the following fields are not enough - many choose to use the Special Instructions or the Customer Notepad to enter additional information, depending on where it needs to show. In addition, if you have purchased the Sales Management module, there is an unlimited contact section available.
There are additional fields in the system to put contact information if the following fields are not enough - many choose to use the Special Instructions or the Customer Notepad to enter additional information, depending on where it needs to show. In addition, if you have purchased the Sales Management module, there is an unlimited contact section available.
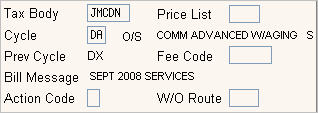
This field is used to group customers in to a geographical 'group' and typically to determine if a CUSTOMER (not a service) is taxable or exempt. It is based on the Service City not the Billing City. There is a table behind it called the Tax Body Master that will list all the choices for this field. The Tax Body codes are usually a geographical related code (such as state, & city) and are used in conjunction with charge codes to determine taxation, franchise fees, fuel surcharges or simply used for reporting purposes. To display choices for Tax Body, simply click on the ![]() or press F4 and the Tax Body scan will be displayed. If you are unsure of which code to use, please check with your System Administrator. Click here for additional information about the Tax Body Master. The Tax Body may be defaulted from the Address Master, or based on the Service City, State and Zip through the Zip Code Master and Zip Code Validation . This field will be mandatory if the company master is set to "Force Tax Body".
or press F4 and the Tax Body scan will be displayed. If you are unsure of which code to use, please check with your System Administrator. Click here for additional information about the Tax Body Master. The Tax Body may be defaulted from the Address Master, or based on the Service City, State and Zip through the Zip Code Master and Zip Code Validation . This field will be mandatory if the company master is set to "Force Tax Body".
This field is used with the Charge Code Master to add flexibility to your pricing structure without having several different charge (service) codes. For example: you have a charge code of 'CS' for curbside trash service, but you have 10 different prices depending on the city/town the customer is in. Instead of the users having a huge hard copy price list, you can use the system to control the pricing. Click here for additional details. This field will be mandatory if the cycle master is set to "Price List Required".
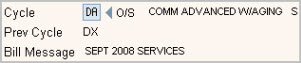
This is the 'billing cycle, or billing group' the customer will be assigned to. It is a required field. The cycle is typically a combination of the type of customer (ie; commercial, residential, roll off), how they are billed and how often (advance, arrears, advance quarter 1, advance quarter 2, biweekly,etc) and the status of the customer (active, inactive, seasonal, collections, etc).To display a list of your choices, simply click on the ![]() or press F4 and the Cycle Scan will be displayed. Select your choice by moving your cursor over the line you want and 'double click' the chosen cycle will then be inserted in to the Cycle Field. The accounting type for the cycle and the description of the cycle will be displayed to the right.
or press F4 and the Cycle Scan will be displayed. Select your choice by moving your cursor over the line you want and 'double click' the chosen cycle will then be inserted in to the Cycle Field. The accounting type for the cycle and the description of the cycle will be displayed to the right.
If you are unsure of the cycle to use, please see your System Administrator, since they set up and determine the cycles. Click here for more information on the Cycle Master.
Prev Cycle: The previous cycle the customer was in. This field is a display only.
Bill Message: The most recent billing period description for recurring charges. This description is entered during the Auto Charge step of Billing. This field is a display only.
Fee Code ![]()
The Fee Code is another way to group customers together and bill special fee's. There is a table behind it called the Fuel/Fee Surcharge Master that will list all the choices for this field. The Fee codes are used in conjunction with charge codes to determine franchise fees, fuel surcharges, special scale charges or simply used for reporting purposes. To display choices for the Fee Code, simply click on the ![]() or press F4 and the Fuel/Fee Surcharge scan will be displayed. If you are unsure of which code to use, please check with your System Administrator. Click here for additional information about the Fuel/Fee Surcharge Master.
or press F4 and the Fuel/Fee Surcharge scan will be displayed. If you are unsure of which code to use, please check with your System Administrator. Click here for additional information about the Fuel/Fee Surcharge Master.
The action code field is typically not used when first setting up a customer unless you want a note to print on the route list indicating the stop is a new service (this is an action code with a Type of Start - click here for additional information). There are 'standard' action codes that perform specific functions in the system.
|
D |
Delinquent - will turn red and the customer will be displayed as Red on the search screens. Printing on Route List can also be controlled through the Route List selections. Will also show in the Cash Receipts program and a separate list of payments received for 'D' accounts will be printed. |
|
L |
Locked - will turn red and the customer will be displayed as Red on the search screens. Printing on Route List can also be controlled through the Route List selections. Will also prevent Work Orders from being Created. Will also show in the Cash Receipts program and a separate list of payments received for 'L' accounts will be printed. |
|
N |
Used to copy an EXISTING customer profile in to a brand NEW account within the same Company. Very useful in creating new locations for Roll Off customers, new contracts for several sites (school, restaurant chain, etc) with the same billing address, and for creating 'vacant' accounts when residents move. Depending on the type of cycle (account class), certain fields will then be blanked out in the new account (such as service address). These fields are determined in the Account Class master - the 'Customer Copy Fields'. Click here for additional information. |
This is the default work order Route field. The purpose is to 'hold' a route id so when work orders are created, they will be assigned to this default route instead of left blank. It assists in data entry and in organizing work orders during On Line Dispatching. For residential customers, this is the route for their first day of service and the system will automatically fill it in once routing is set up and Enter is pressed. For non residential customers, this field is not automatically filled in, you can use a 'generic' route to distinguish Commercial customers, and for Roll off customers you can use 'zoning' or 'generic routes based on sections of your service area. You can also leave this field blank.
![]()
Top 2 boxes
These are referred to as Special Instruction lines 1 & 2. These lines are for comments or notes to the driver and will print on Route Lists and Work Orders. They will NOT print on a bill; however, the customer could potentially see the comments if copies of work orders are given out. If there are additional instructions the driver will need to see and there is not enough room here you can enter more notes into the customer Notepad so you do not need to abbreviate (this will be covered in the Notepad section).
Bottom 2 boxes
These are referred to as Special Instructions lines 3 & 4. These lines are for internal comments only - the driver will NOT see these on a Route List or Work Order and they will NOT print on a bill. They are used for extra comments that other users may need to know when looking at the customer. However, they are displayed when viewing a work order, so 'billing related' comments may be entered here - like 'no extra's without PO's, must get approval from Janice, etc'. Additional phone numbers and contacts may also be entered here.
![]()
Master No: if this customer is a 'sub-account' attached to a master billing account, or should be attached to a master; enter the Master account's Company and Customer number. What are sub - master accounts?
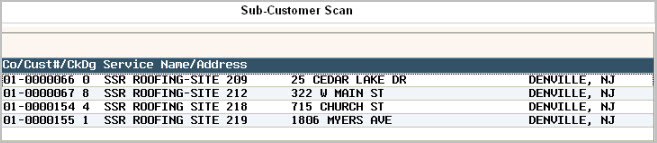
If this is the MASTER account, this field will be left blank and will display ![]() . Click this button to display a list of all the sub accounts linked to this master, the Sub-Customer Scan will then be displayed.
. Click this button to display a list of all the sub accounts linked to this master, the Sub-Customer Scan will then be displayed.
National Acct No: This field is used to produce one bill for customers that are in different companies. It is similar to a sub-master relationship, but all the balances remain on the individual accounts. National Accounts are only valid for Open Statement accounting types. You have the option, in the company master, of printing an invoice for the national account only, or the national and sub accounts.
If this is the NATIONAL account, this field will be left blank and will display ![]() . Click this button to display a list of all the sub accounts linked to this National, the Sub-Customer Scan will then be displayed.
. Click this button to display a list of all the sub accounts linked to this National, the Sub-Customer Scan will then be displayed.
![]() You cannot link the following:
You cannot link the following:
If the customer is a Master Acct, cannot enter a Master Customer# on the customer profile.
If the customer is a Master Acct, cannot enter a National Customer# on the customer profile.
If the customer is a National Acct, cannot enter a National Customer# on the customer profile.
If the customer is a National Acct, cannot enter a Master Customer# on the customer profile.
If the customer is not a Master or a National Acct, but you are entering a National Acct# on the customer profile - the National Customer# being entered cannot be in a Master Cycle.
![]()
Variables are extra fields that can be used for specific needs in your environment. They are set up in the Company Master file. If these are not defined in the Company Master, they will NOT be displayed on this screen or under the Variables Tab.
Var 1 & Var 2: Numeric only and can be used to add, subtract, add a % or discount monthly charges. They can be set up to be required so the user's have to key something in before exiting the Customer Profile. The headings can be changed to label what information you want your users to key into the field. Var 1 has been changed above to Fuel Surchg.
Var 3 & Var 4: These fields are alpha numeric and can be set up as required and edited against a table (note the ![]() ) so data entry is consistent. Information in Variable 3 & 4 also attach to sale records for reporting purposes. Variable 3 & 4 tables can be updated under the Customer Service master files.
) so data entry is consistent. Information in Variable 3 & 4 also attach to sale records for reporting purposes. Variable 3 & 4 tables can be updated under the Customer Service master files.
User: This is an 'extra' field that is attached to sale records for reporting purposes. The description can NOT be changed and it is not table driven.
![]() The display of these fields is standard on the Variables Tab; however, it is a flag that must be activated to display on the customer profile screen. Contact the support services department to activate this feature if you do not currently have it.
The display of these fields is standard on the Variables Tab; however, it is a flag that must be activated to display on the customer profile screen. Contact the support services department to activate this feature if you do not currently have it.
This is the email address that you want your PDF bills to be sent to. This same field is displayed at the bottom of the Additional Information tab as well. Changing the field on either screen will update both places. This field may or may not display on your customer profile screen based on settings configured by the support department. Contact support at [email protected] if you would like to have this field removed or added.
![]()
This is the customer's credit limit and available credit remaining. This field can be set up as a required field, and can be automatically calculated based on the Monthly charge, (see the Cycle Master section for additional information). The system will automatically calculate the available credit by taking the credit limit and subtracting the (unbilled $ + balance due).
When the Credit Limit has been exceeded
![]()
Once the credit limit has been exceeded; this field will turn red and the customer will print on the Credit Limit Exception Report generated during Day End. They will be 'halted' at the Scale-House if using Scale-Pak, and new work orders will not be allowed if you have the Credit Limit Lock feature activated. Contact support at [email protected] to turn this feature on.
![]() The prevention of certain transactions (Scale-Pak and work orders) can be overridden by a System Administrator or a user with override authority. Please review the User Security section of System Administration - click here for details.
The prevention of certain transactions (Scale-Pak and work orders) can be overridden by a System Administrator or a user with override authority. Please review the User Security section of System Administration - click here for details.
![]()
The Sales ID field is a place to enter the Sales Person ID that is responsible for this account. To display choices for the Sales ID, simply click on the ![]() or press F4 and the User scan will be displayed. Only User ID's marked as "salesperson
or press F4 and the User scan will be displayed. Only User ID's marked as "salesperson ![]() " in User Security will display since those are the only ID's that can be entered into this field. This field can be used in variable reporting to track revenue by sales person. It's also a way to limit the accounts that a sales person can access. Any User ID marked as "salesperson
" in User Security will display since those are the only ID's that can be entered into this field. This field can be used in variable reporting to track revenue by sales person. It's also a way to limit the accounts that a sales person can access. Any User ID marked as "salesperson ![]() " in User Security can only access the accounts their Sales ID is entered on. (*Note* - If Sales Management is active, then they may be able to access all accounts if the have the highest security level.) This field will be mandatory if the cycle master is set to "Sales ID Required".
" in User Security can only access the accounts their Sales ID is entered on. (*Note* - If Sales Management is active, then they may be able to access all accounts if the have the highest security level.) This field will be mandatory if the cycle master is set to "Sales ID Required".
![]()
This field is designed for municipality billing but may be used for other types of billing if it meets your needs. In this field you enter the Municipal Customer # (must be in the same company as the current customer) that you want a portion of the bill to go to. Click here for full details on how Municipal Billing works.

The Services Overview is a display only section that shows you the information found on the first four lines of the Services screen. It is meant to allow you to view that information easily on the profile without having to go to another screen to see what services they currently have. You will need to go to the Services Tab in order to update the information or see more services if applicable. Click here to see information on Services and what the fields mean.
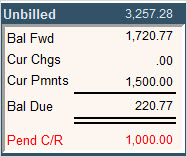
This section is display only. It shows the customer's Unbilled charges (if an O/S customer), the Balance Forward (Bal Fwd), Current Charges (Cur Chgs), Current Payments (Cur Pmnts), Balance Due (Bal Due) and the amount of Pending C/R that are waiting to be posted. The Current Charges and Current Payments fields are reset to zero during Month End (for O/I, O/S, or O/A) or during Statement runs (for B/F). A more detailed break down of the customer's balance (aging, open invoices, payments, etc) will be shown on the A/R History screen. ![]() If the balance due is a credit, it will be displayed in yellow.
If the balance due is a credit, it will be displayed in yellow.
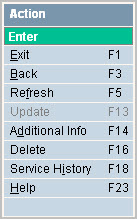
In general, Exit will take you back to the menu or, in this case, to the customer search screen. Back will take you back one screen and Refresh will remove any changes entered and refresh it back to the last time it was saved. Update will be greyed out when you are in update mode. You need to be in Update mode in order to change anything on the account or access any master files from this screen. Additional Info will take you to the Additional Information screen.
DELETE: To delete a code click or press ![]() . The system will do some checks to verify whether the account can be deleted.
. The system will do some checks to verify whether the account can be deleted.
You cannot delete an account that has a balance due, or anything in their current charge or current payments field.
You cannot delete an account if they have any open work orders or work orders that are less than 90 days old.
You cannot delete an account if they have any "active" notes.
You cannot delete an account if they exist in any "pending" or open Sales & Adjustment or Cash Receipt batches.
You cannot delete an account if a "pending" proration exists.
If you attempt to delete an account that doesn't fit these requirement, you will get a red display message at the bottom of your screen like: ![]() . If none of these issues relate to this account, then when you press
. If none of these issues relate to this account, then when you press ![]() you will get a display message on the bottom of the screen:
you will get a display message on the bottom of the screen: ![]() .
.
![]() There is NO UNDO button, once a customer is deleted it is gone. Click or press
There is NO UNDO button, once a customer is deleted it is gone. Click or press ![]() to confirm deletion.
to confirm deletion.
There is a Deleted Customers report on the i-Pak Customer Reports tab that will show you who and when the account was deleted. This report only works if the system master is set to "Log Deleted Customers".
All Cash and Sale records for accounts that are deleted are moved into a "Deleted" account for tracking purposes. This allows you to continue to run historical variable reports on the data to match the Cash and Sales figures that were displayed on your month end reports. The "Deleted" account usually starts with 999999. You should have one for each accounting type. The system will automatically create this for you if it doesn't exist. You cannot delete a "Deleted" account.
Service History: Will take you to the Service History screen to view changes and updates to the Services screen.
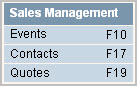
These items will only display if you have Sales Management activated on your system. Contact the Sales Department at 888-763-8725 if you would like more information on this module.
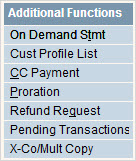
On Demand Stmt - This option will print a one-time statement, for this account, showing all charges and payments that have been posted. It will NOT update those records as having been through a statement run. Therefore, if you were to include this customer in a statement run later in the day, you would get a duplicate bill.
Cust Profile List - The Customer Profile List feature will print a one page document of information about the customer. It's meant to be a quick overview of their profile, services, work orders, A/R History and Notes. Click here for a sample of the document named CS0025P = Customer Profile.
CC Payment - If your company accepts credit cards and you are authorized to take credit card payments, then you should see this option on your screen. When selected, you will be brought into the charge card processing screen.
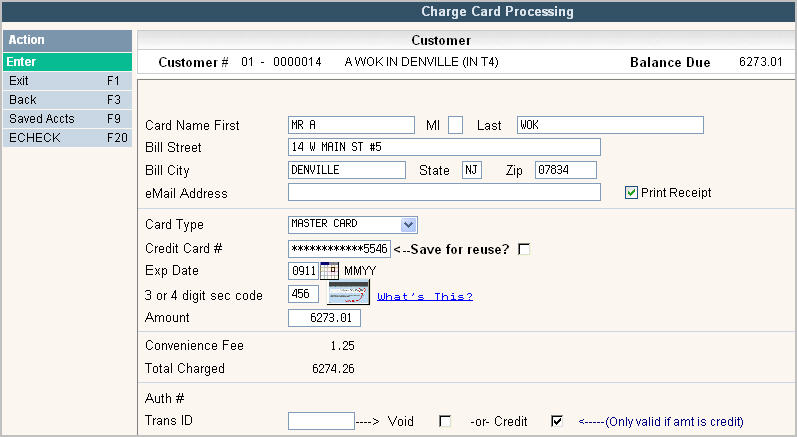
The Card Name and Address will default into the name and address fields from the Secure Information tab but can be overridden if necessary.
The receipt can be emailed if you enter an email address into the eMail address field when processing the payment.
Check ![]() Print Receipt if you want a printed receipt to be generated when the payment is processed.
Print Receipt if you want a printed receipt to be generated when the payment is processed.
The card type, credit card #, exp date can be manually entered, or can be set up to automatically default in from the Secured Information screen. Contact support at [email protected] if you would like the credit card information to default in. i-Pak will display the valid card types based on the entries in the Credit Card Master file.
The 3 or 4 digit security code must always be manually entered for PCI Compliance.
The customers balance due will default into the Amount field, but can be changed if the customer wants to pay a different amount.
The Convenience Fee and Total Charged fields are displayed if your company master has an amount and GL code set up in the Payment Fee's section. Click here to see the credit card set up information from the accounting tab in the company master. The Convenience Fee is a fee you determine that can be automatically applied to each credit card transaction you perform. The amount is posted to the GL code found in the company master and entered as a Miscellaneous Cash Receipt on your Cash Batch. The Total Charged is the total of the Amount plus the Convenience Fee.
The Auth # is the authorization # that the credit card company will send back to you once the credit card has been approved.
The Trans ID is a number attached to the credit card payment that must be entered if you need to Void (remove a charge to the credit card that has not been processed by your credit card company) or Credit (put a negative charge on the credit card to offset the amount that was previously posted.) The Transaction ID can be found in the A/R history screen if posted.
Proration - Prorations are a quick and easy way to give an account a credit or debit adjustment based on a change in their level of service. If they are a new customer and starting mid-month, cancelling mid-month, or changing service levels mid-month, you can easily assess a prorated amount for the service they did use. Click here for more details on Prorations.
Refund Request: The refund request option allows you to initiate a request to send a customer a refund. This request is then reviewed by a supervisor and either approved or denied. If approved, the refund will be sent and a debit Sales & Adjustment will be created for the customer. When you click on the Refund Request option, the Customer Refund Request screen will appear.

The Customer Number, customer (billing) name and address, cycle and balance due are all displayed for reference at the top of the screen.
The customers balance due will automatically default, as a debit vs a credit, into the $ Amount field to refund.
If your company master is set to default a Processing Fee Sz/Cg, then that size/charge code will automatically be inserted into the field along with the associated amount from the charge code master. This fee can be removed on an individual basis by deleting the default Sz/Cg and price on this screen.
The Refund Adjustment Sz/Cg also defaults in from the setting in the Company Master. This is the size/charge code used for the Debit Sales & Adjustment that is created to account for the refund you are sending to the customer. The Sz/Cg can be changed, but a code must exist in order for the refund request to be created.
The Reason for Refund notepad code comes from the Company Master as well, but can be overridden if needed.
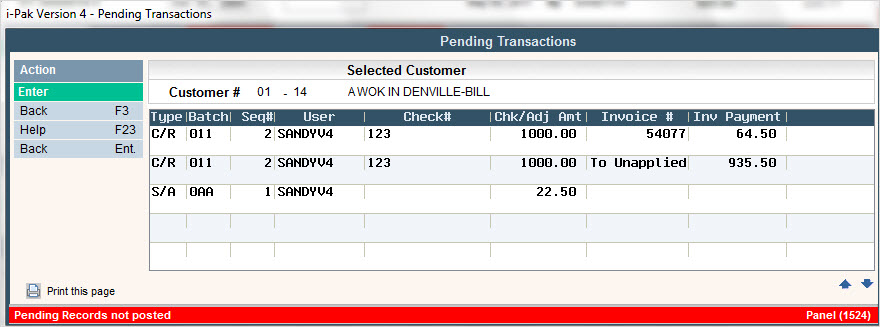
Pending Transactions: This option will bring up a window to display all of the pending batch transactions that are waiting to be posted to this customers accounts, including pending recurring credit card or e-check (EFT) transactions. When you click on the option it will being up the Pending Transactions Window.
X-Co/Mult Copy - This feature allows the user to copy the current customer profile into multiple companies at one time. It will use the copy template (from the account class master) from the customer that is being copied. Click here for more information on how the Cross Company/Multiple Customer Copy Feature works.