The User Security Entry / Update screen is used in the i-Pak system to control the user's access to menus, particular functions and options, the user's authority level within programs, cursor positioning, and other program defaults. Only a user set up as System Administrator will have access to this file.
This screen MUST be completed for every user who will need access to i-Pak. The user ID that is used in i-Pak must be the same as what is set up on the the i-Series server.
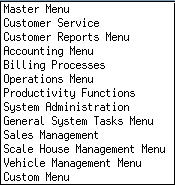
From the i-Pak Master Menu, select the System Administration option.
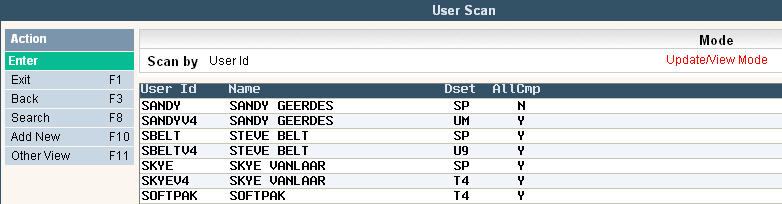
From the System Administration Menu, select the User Security Entry/Update option. The User Scan field will be displayed.
Select a user to access their User Security record by double clicking on their user id or highlighting the line and pressing enter.
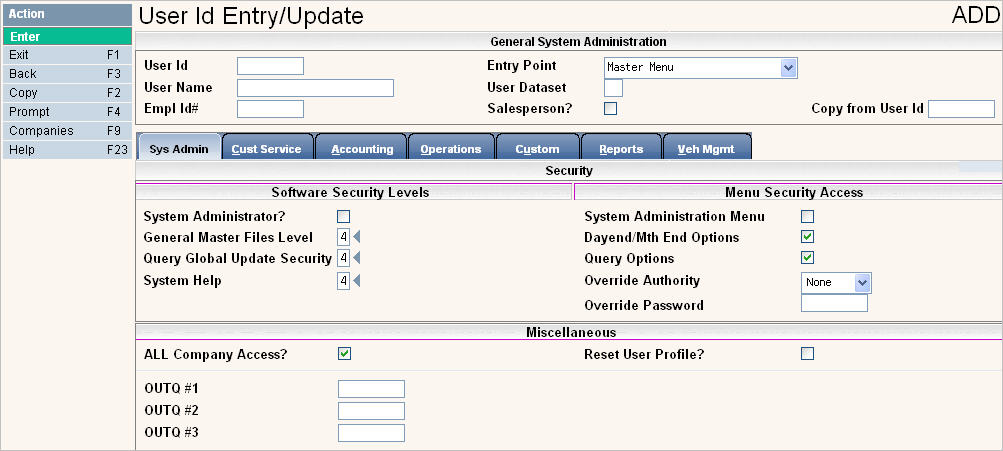
To create a New record, click on ![]() . The User Security Entry/Update screen will be displayed.
. The User Security Entry/Update screen will be displayed.

![]() Note: In order to successfully create a new user (either by typing all fields or copying from an existing user) OR when making changes to a user id; you MUST PRESS ENTER through all the screens/tabs or press
Note: In order to successfully create a new user (either by typing all fields or copying from an existing user) OR when making changes to a user id; you MUST PRESS ENTER through all the screens/tabs or press ![]() (which only appears after making a change) in order to save the changes.
(which only appears after making a change) in order to save the changes.
User Id: type in the User ID for the user - this should match the i-Series server User ID.
Entry Point: select the first screen that should be shown when the user signs on. For example, if the user is in customer service and primarily answers phones and customers' questions then their entry point might be customer service; however a scale-house attendant at a landfill or transfer station may want to go right to the Scale House Management Menu. This is a way to customize the initial screen for your users to assist them in quickly accessing the information they need.
User Name: type the user's full name or description
User Dataset: type the 2 character abbreviation assigned to your company's data - the data set must be created before any users can be assigned to that data set.
Empl Id #: this field is an extra field you can use for an employee number (or other information) - this is not used in the i-Pak system. It is an extra field that can be used in reporting tools such as IBM Query, Crystal Reports, etc.
Salesperson?: If a User ID is marked as a Salesperson they can ONLY update accounts linked to their name (unless they have a level 4 under SALES MANAGEMENT security). The link happens by entering their UserID in to the Sales ID field in the customer profile. Only users that have a ![]() in the Salesperson field will be displayed when clicking on the Sales ID prompt from the profile screen.
in the Salesperson field will be displayed when clicking on the Sales ID prompt from the profile screen.
Copy from User ID: this field can be used to copy the settings from another user to this user id. Simply type in the User ID you want to copy and either click the Copy F2 button or press the F2 key on your keyboard, the other settings will then be filled in - you will however, need to go back to the User Name field and update the name.

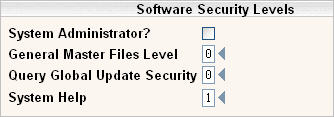
System Administrator?: this field determines if the user is a system administrator which controls the following:
Ability to add, update or delete User ID's in the User security file (must also have access to the system administration menu and general master files). Fill in the screen with the appropriate selections - to allow access (yes) click on the box ![]() - leave blank for no.
- leave blank for no.
Ability to override the creation of a work order for a locked account (action code = L)
Ability to override amounts outside the percentage control limit (determined by the company and/or charge code master)
Ability to override credit limit locks (feature that can be enabled by support.)
Ability to override Contract Expiration locks for Work Orders (feature enabled by support.)
Ability to access ALL users Variable Report Templates.
Ability to unlock customers and work orders for all users.
Ability to Start and Stop i-Pak.
Ability to perform the following Address Master options:
Update Customers from Address Master
Create Address Master from Custs Accounts
Ability to perform the following Container Inventory options:
Build Serial# Master from Customer File
Relocate Serial#'s from one company to another
Create/Delete a Range of Serial#'s
Ability to update the Calendar File Maintenance
Ability to use the Manual Route Lock option in the Route Master
Ability to perform the following Charge Code Master options:
Delete a charge code
Update the "Allow Override $" flag
Update the "% Override" field
Ability to use the Mark Offset feature
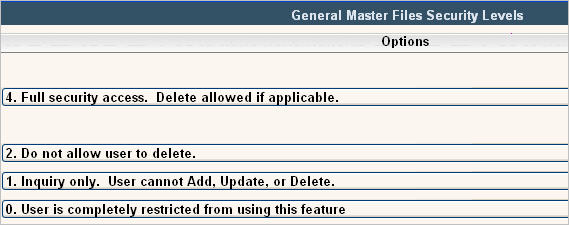
General Master Files Level: this field determines the access to 'general' master files, the master file listing and the master file history. You must have access to General Master Files in order to access any of the other Master Files, User Security and to perform a Global Update. The General Master files are basically fields that are not controlled by menu options under the regular master files. Fields such as Sales ID in customer service and Last Service Date in Vehicle Management. At this time, General Master File Security also determines whether a user has access to the Scale-Pak Master Files. Options are:
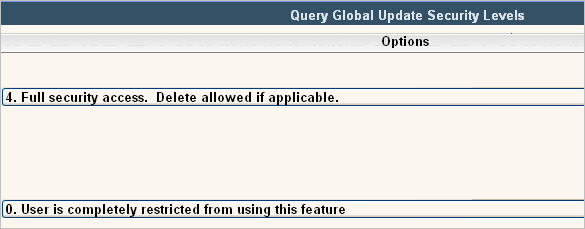
Query Global Update Security: this field determines access to run global updates. However; in order to create the global update file, access to query and a level 4 for General Master files is needed. A user needs to have both query option access checked AND global update access to have the global update menu options displayed. Options are:
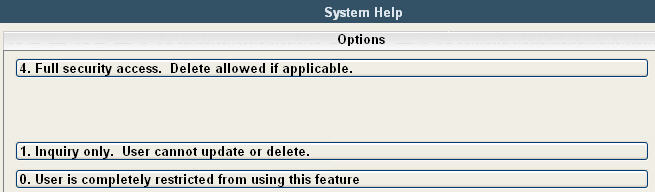
System Help: this field determines access to the system help screens![]() . Throughout the system there are 'help' screens where notes or hints or even procedures can be written on and accessed by all users, or just your own user id. This access determines if a user has access to create or just view the system help; however a user can still access their own 'personal help' screens if needed.
. Throughout the system there are 'help' screens where notes or hints or even procedures can be written on and accessed by all users, or just your own user id. This access determines if a user has access to create or just view the system help; however a user can still access their own 'personal help' screens if needed. ![]() This is NOT security for the on-line help documentation that Soft-Pak has created. Options for the System Help security are:
This is NOT security for the on-line help documentation that Soft-Pak has created. Options for the System Help security are:
Fill in the screen with the appropriate selections - to allow access (yes) click on the boxes to put a ![]() - leave blank for no.
- leave blank for no.
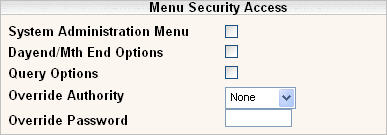
System Administration Menu: this field controls whether the system administration menu is displayed as an option for the user. If not checked, the menu option will NOT be displayed. If checked, the menu option is displayed. The system administration menu options are controlled by other security fields in User Security. This just determines whether the menu is displayed.
Dayend/Mth End options: this field controls whether the day end and month end options are displayed (on the system tasks menu) for the user.
Query Options: this field controls whether the query and global update options are displayed (on the system tasks menu) for the user.
![]() Note: This option only controls whether the options for global updates display on the screen. The user must have access to "Query Global Update Security" (see above) as well as "Query Options" checked in order to perform a Global Updates via Query on the System Tasks Menu.
Note: This option only controls whether the options for global updates display on the screen. The user must have access to "Query Global Update Security" (see above) as well as "Query Options" checked in order to perform a Global Updates via Query on the System Tasks Menu.
Override Authority: this option works with either or both (or none) of 2 different override options:
 Credit (limit) override, Pricing override, both or none.
Credit override means that if the creation of a work order is prevented due to an action code of 'L' OR the credit limit has been reached, the user may override the 'block' and create a work order. If they are not the user that is trying to create the work order, they may override the block by typing in their user id and a special password (see override password below).
Pricing override means that if the creation of a work order is prevented due to a price being entered below the allowable % discount OR the Contract Price Expiration Date has been reached, the user may override the block. If a different user is keying in the work order and does not have pricing override access, then a user WITH pricing override access can override the block and enter the information using their user id and special override password (see below).
Click here for more details on the % Override Options
![]() Note: in order for i-Pak to block the creation of a work order when the CREDIT LIMIT is reached, a flag must be turned on - please contact Support Services at 800-860-4327 to turn these feature on. The block of a work order using the action code of 'L' is something that is standard in the system. The % override feature is turned on simply by entering a % override limit in either a specific charge code in the charge code master or in the company master. The prevention by Contract Expiration Date is activated by a flag at the cycle level.
Note: in order for i-Pak to block the creation of a work order when the CREDIT LIMIT is reached, a flag must be turned on - please contact Support Services at 800-860-4327 to turn these feature on. The block of a work order using the action code of 'L' is something that is standard in the system. The % override feature is turned on simply by entering a % override limit in either a specific charge code in the charge code master or in the company master. The prevention by Contract Expiration Date is activated by a flag at the cycle level.
Both - the option of both means the user has both credit override authority AND pricing override authority.
None - the user does not have credit override authority and cannot create a new work order (if the action code is an 'L' or if the credit limit is reached) nor do they have pricing override authority. If they need to do either, they will need a supervisor to authorize.
Override Password: this is the special password that the supervisor must enter when doing either a credit override authorization or a pricing override authorization. This may be different than their i-Pak sign on password. Once the password is entered and saved to this screen, it will only display as * for security purposes.

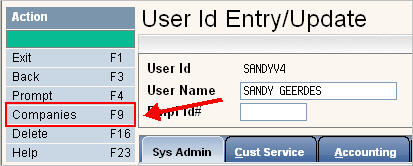
All Company Access?: this field controls the companies the user may access. If checked (![]() ) the user will have access to all companies within that data set. If not checked, the specific companies must be designated. Simply press your F9 key or click on the companies button on the left side of the screen, the system will display the list of companies:
) the user will have access to all companies within that data set. If not checked, the specific companies must be designated. Simply press your F9 key or click on the companies button on the left side of the screen, the system will display the list of companies:
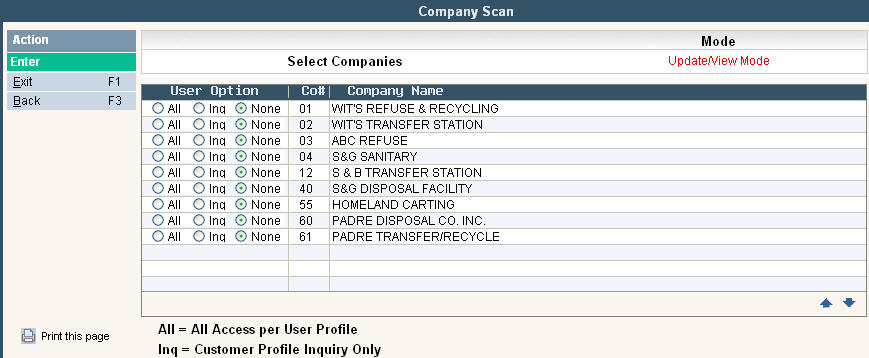
Within each company you have the option to give the user ALL (All Access based on their user profile), INQ (Customer Profile Inquiry Only) or None (No access) by checking the radial button next to the appropriate choice for that user. After making your selections, press ![]() and
and ![]() .
.
The following OUTQ fields correspond to OUTQ entries on the i-series server and increase the printing flexibility of i-Pak reports and forms. If a report is set up to go to user OUTQ # 1, 2 or 3 - the system refers to this section to see what printer or OUTQ is the corresponding position and will send the report/form to that OUTQ.
OUTQ#1: corresponds to user outq #1 in the report form printer file.
OUTQ#2: corresponds to user outq #2 in the report form printer file.
OUTQ#3: corresponds to user outq #3 in the report form printer file.
In the Outqueues section, enter specific printer Output Queue's that are set up on the i-Series server. These 3 fields correspond to the User Outqueue # in the Report Form Printer Set Up file and help to control printing to different printers.
Reset User Profile?: This flag allows a user access to the menu option ![]() on the System Administration menu. This option is used to *ENABLE a user profile that has been *DISABLED from signing onto i-Pak.
on the System Administration menu. This option is used to *ENABLE a user profile that has been *DISABLED from signing onto i-Pak.
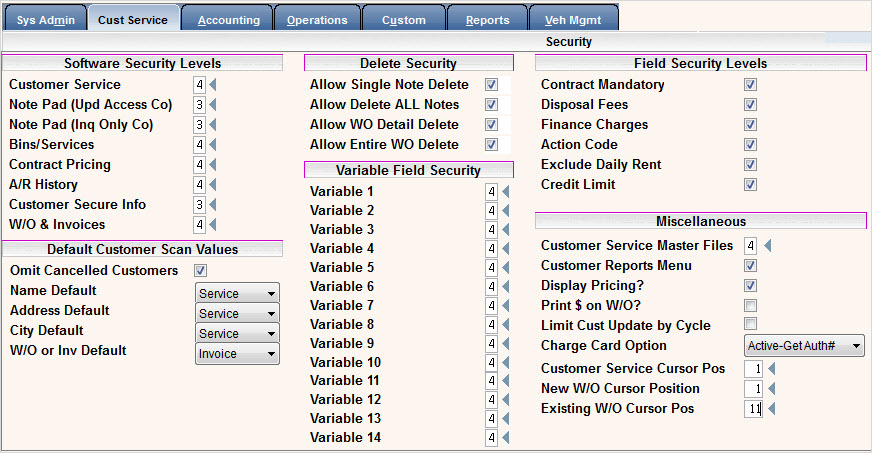
In this section, you can control IF the user has access to the specific program and if yes then WHAT they can do within that section of the program. This works in conjunction with the menu security levels throughout user security. For each section of the software, click on the ![]() to display the levels of access available or use the
to display the levels of access available or use the ![]() check box to Allow access (Yes) or
check box to Allow access (Yes) or ![]() Not Allow access (No).
Not Allow access (No).
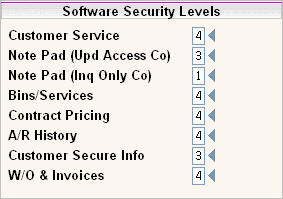
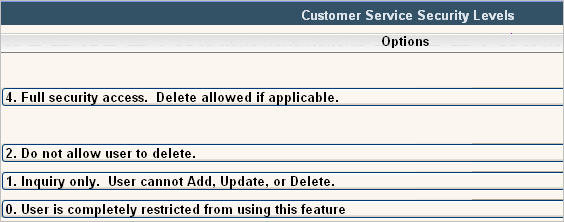
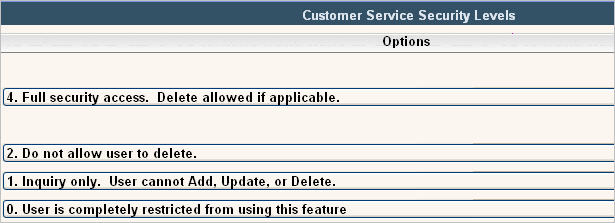
Customer Service: this controls whether a user has access to Customer Service. Option levels are:
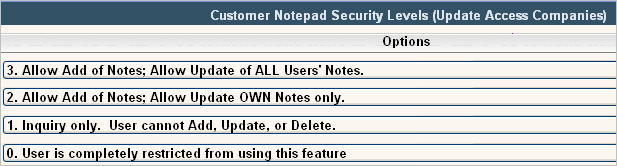
Note Pad (Upd Access Co): this controls whether the user has access to the customers notepad screen on the customer profile when they have ALL access to the company that the customer is in. Option levels are:
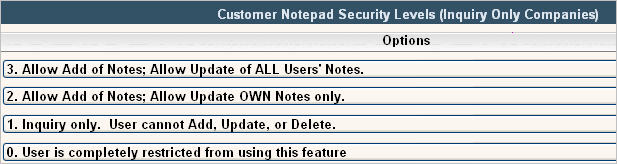
Note Pad (Inq Only Co): this controls whether the user has access to the customers notepad screen on the customer profile when they have Inquiry Only access to the company that the customer is in. Option levels are:
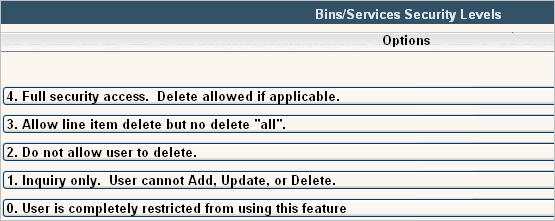
Bins/Services: this controls whether the user has access to the customers Services screen on the customer profile. Option levels are:
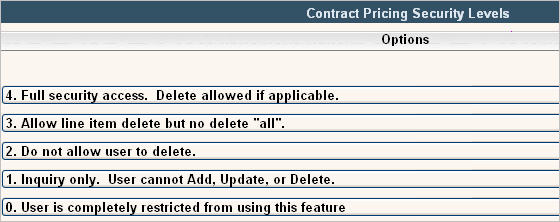
Contract Pricing: this controls whether the user has access to the customers Contract Pricing screen on the customer profile. Option levels are:
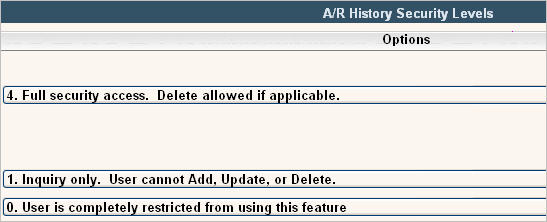
A/R History: this controls whether the user has access to the customers A/R History screen on the customer profile. Option levels are:
Customer Secure Info: this controls whether the user has access to the customers Secure Info screen on the customer profile. Option levels are:
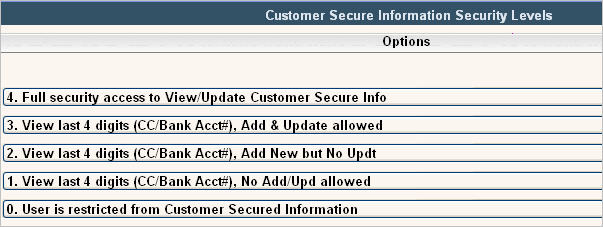
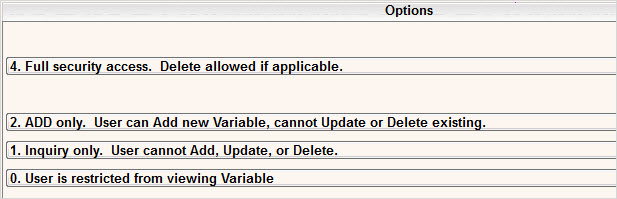
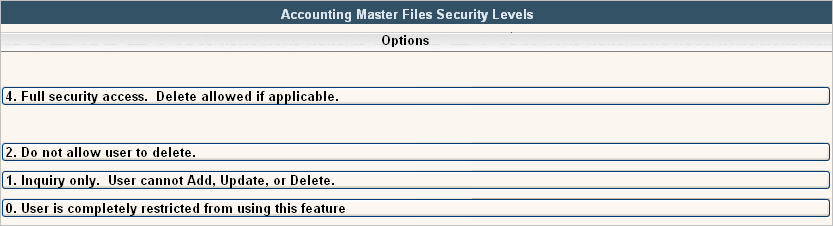
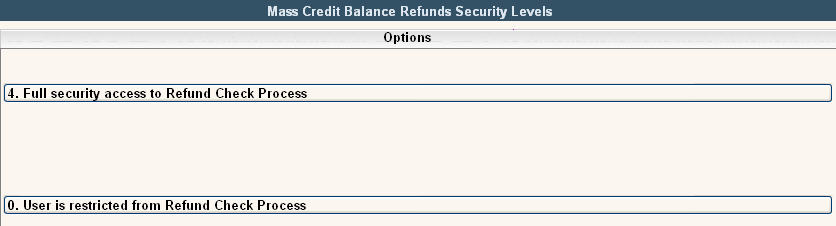
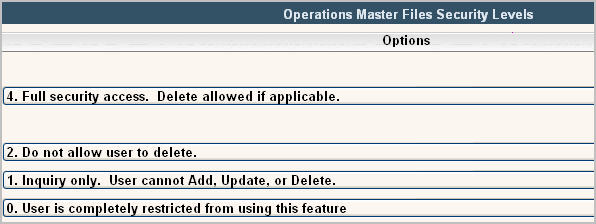
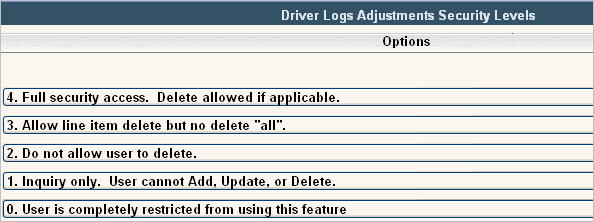
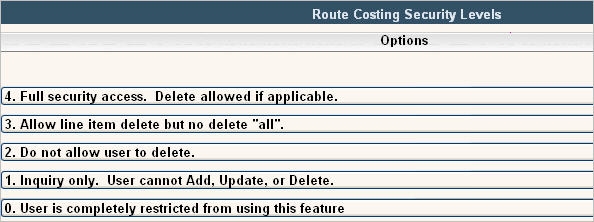
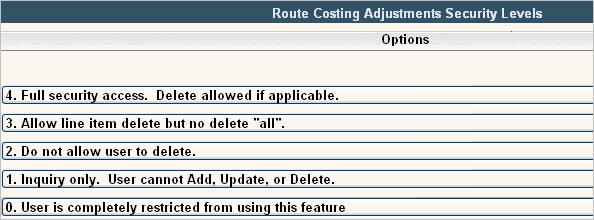
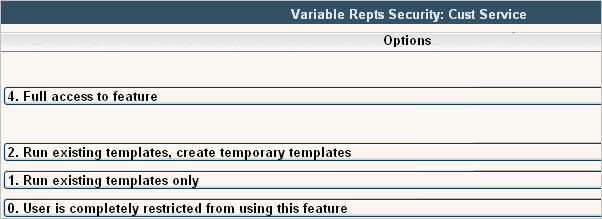
![]() Option #4 = Full Security Access should only be given to users with the highest level of trust and authority. We recommend not giving this authority to anyone. i-Pak has the option of not even displaying level 4 on the screen. Please contact support at [email protected] if you would like your system set up to not allow #4=full security access.
Option #4 = Full Security Access should only be given to users with the highest level of trust and authority. We recommend not giving this authority to anyone. i-Pak has the option of not even displaying level 4 on the screen. Please contact support at [email protected] if you would like your system set up to not allow #4=full security access.
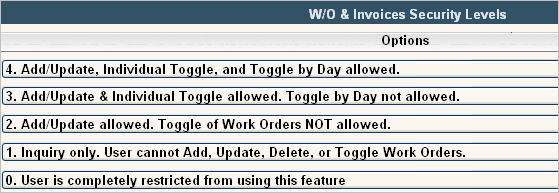
W/O & Invoices: this controls whether the user has access to the customers Work Order screen on the customer profile and Invoice Toggling features found within the system. Option levels are:
Delete Security
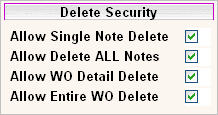
These settings work along with the Notepad and W/O & Invoices Security shown above. It allows limits on deleting even to users with full access to the process. To allow Delete abilities (yes) click on the boxes to put a ![]() - leave blank for no.
- leave blank for no.
Allow Single Note Delete - Do you want to allow the user to be able to delete one note record in the customers notepad?
Allow Delete ALL Notes - Do you want to allow the user to be able to delete ALL the notes in a customers notepad?
Allow WO Detail Delete - Do you want to allow the user to be able to delete a detail line in a work order?
Allow Entire WO Delete - Do you want to allow the user to be able to delete a whole work order?
![]() We suggest that for all (or most) users, the level to 'delete all' is NOT given to Entire WO or Note pad since a user could potentially delete an entire Work Order or All Notes on accident.
We suggest that for all (or most) users, the level to 'delete all' is NOT given to Entire WO or Note pad since a user could potentially delete an entire Work Order or All Notes on accident.
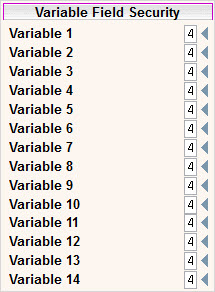
These options control whether the user has access to the variable fields located on the Customer Profile and the Variables Tab. Option levels for all the Variables are the same and they are:
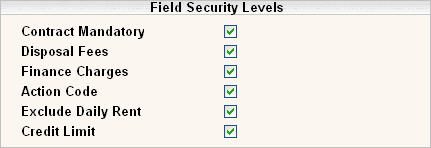
Fill in this section with the appropriate choices - to allow access (yes) click on the boxes to put a ![]() - leave blank for no.
- leave blank for no.
Contract Mandatory: this allows a user access to update the Contract Mandatory field on the Additional Info tab in the Customer Profile screen.
Disposal Fees: this allows a user access to update the Disposal Fee Req field on the Additional Info tab in the Customer Profile screen.
Finance Charges: this allows a User access to update the Finance Charges field on the Additional Info tab in the Customer Profile screen.
Action Code: this flag determines whether a user has access to delete the Action Code field on the Customer Profile screen when the code is an L (locked) or D (delinquent). It does not restrict the user from adding any code and it only restricts access to delete or change a code if it's an L or D.
Exclude Daily Rent: this allows a user access to update the Exclude Daily Rental field on the Additional Info tab in the Customer Profile screen.
Credit Limit: this allows a user access to update the Credit Limit field on the customer profile tab if the cycle is not set to default in the credit limit. Also allows a user to run the process "Update Credit Limits" from the System Admin menu.
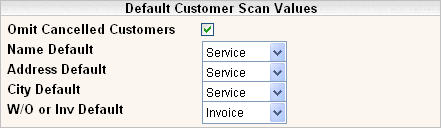
This section refers to different defaults on the customer search screen that can be set up for each user. The option selected will be defaulted in to the corresponding fields on the customer search screen when customer service is first accessed. The user can change the options at any time once they are on the search screen.
Omit Cancelled Customer: select yes (![]() ) or no (blank).
) or no (blank).
Name Default: this is the name field and can be set to default to either the billing name or service name. A collections or A/R user may want to search for customers by the billing name whereas a dispatcher or customer service rep may want to search by service name. A broker name may be the billing name but the actual store name is the service name. As long as the data is set up with different names, the system will provide the flexibility of searching for either name.
Address Default: similar to the name default, this is to default either billing or service address. A collections or A/R user may want to search by the billing address whereas a dispatcher may want to search by a service address.
City Default: similar to the name and address default, this is to default either the billing or service city.
W/O or Inv Default: this is the default for either a work order number (W) or an invoice number (I).

Customer Service Master Files: this field controls the level of access to customer service master files (customer variables 3 and 4, expanded variables 5-9, street suffix, state/country code, and the zip code master). Click on the ![]() to display the options.
to display the options.
Levels of access are:
Fill in the screen with the appropriate selections - to allow access (yes) click on the boxes to put a ![]() - leave blank for no.
- leave blank for no.
Customer Reports Menu: this controls if the user has access to the customer reports menu. Check the box for yes ![]() , or leave blank for no.
, or leave blank for no.
Display Pricing?: this field controls whether pricing is displayed throughout the i-Pak screens. If this field is set to no (blank box) then the word SECURED will be displayed where there would normally be a price.
Print $ on W/O?: this field controls whether dollar amounts print on work orders for this user. Leave blank for no and click in the box for yes![]() .
.
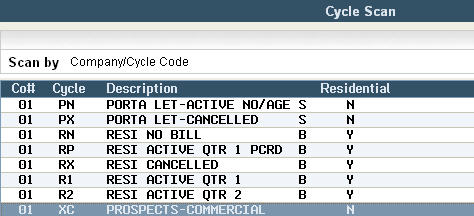
Limit Cust Update by Cycle: this field controls whether the user should be restricted to updating customers in certain cycles. This is typically used with salespeople to control their access to customers that are not in a "prospect" cycle. If yes is selected (![]() ) then the specific cycles have to be selected. Click on the cycles button on the left side of the screen:
) then the specific cycles have to be selected. Click on the cycles button on the left side of the screen:
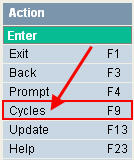 Select the cycles with a single click on the cycle line, hold down the control key to select several cycles. Press enter to save then F11 to confirm.
Charge Card Option: this field controls access to credit card processing. Options are:
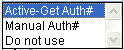
If the user will have access to on line credit card processing select 'active-get auth#'. If the user can have access to manually enter credit cards with an authorization number select 'manual auth#'. If the user can NOT have access to credit card processing, select 'do not use'.
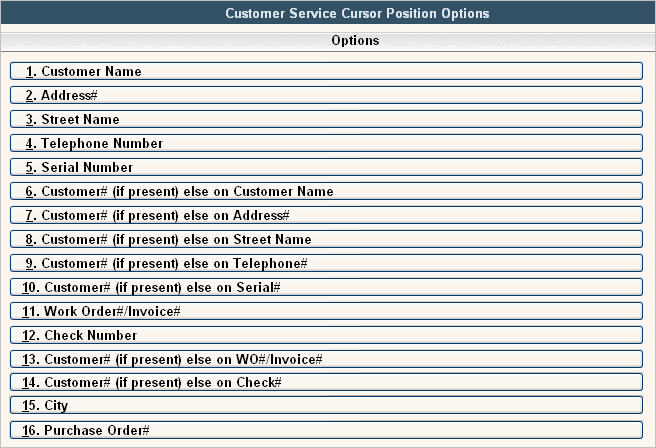
Customer Service Cursor Pos, New W/O Cursor Position, Existing W/O Cursor Pos:
These are 3 areas were the cursor position can be defined differently for each user (if desired or needed). The cursor position controls where the cursor will start when the program is first initiated; the user may move to different fields of course, this simply controls where their cursor will be most of the time.
Placing the cursor in different fields for different users (based on their needs) helps to make keying more efficient. For example, a collections person may want to begin at the customer number, yet a dispatcher may want to begin at the service address field.
For a list of choices for each section, click on the ![]() .
.
Options for Customer Service - Search screen
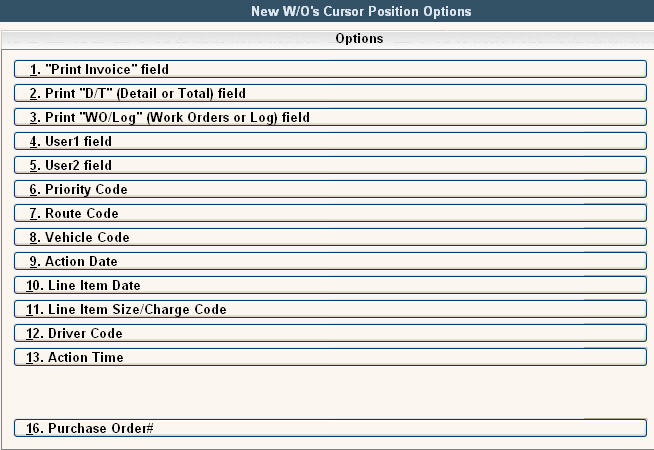
Options for Work Orders - For Existing and New:
Typical entries: Existing = 11, New = 9 or 4 (if using User 1 as a Caller field).
In this section, you can control IF the user has access to the specific program and if so, WHAT access they have within that section of the program. This works in conjunction with the menu security levels throughout user security. For each section of the software, click on the ![]() to display the levels of access available. The level ranges vary from 0 (no access) to 5 (ALL access including delete); however, not all levels are valid in each section.
to display the levels of access available. The level ranges vary from 0 (no access) to 5 (ALL access including delete); however, not all levels are valid in each section.
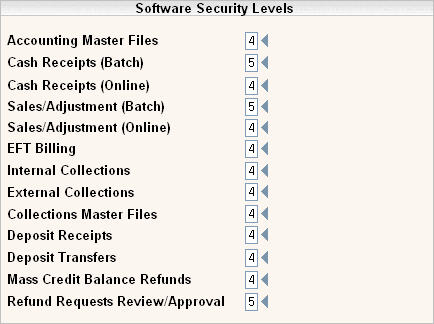
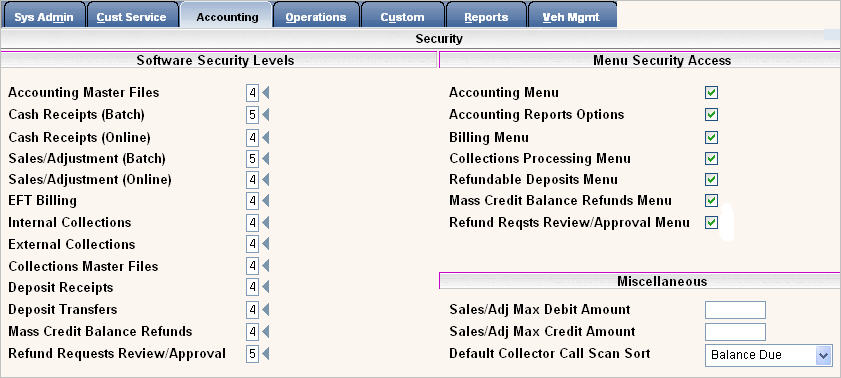
Accounting Master Files: this controls access to the accounting master files: company, general ledger, tax body, cycle, charge code, prorate code, action code, priority code, note pad code, messages, account class, price list, credit card, aging style, fuel/fee surcharge and Bin Type code.
Optional levels are:
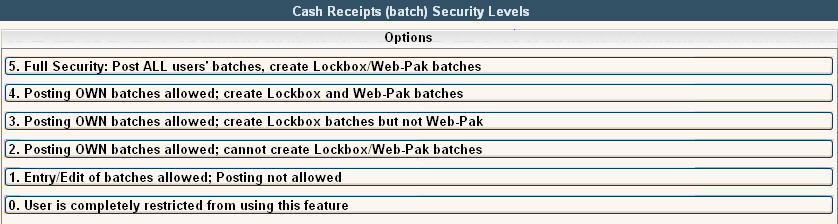
Cash Receipts (Batch): this controls different options available in batch cash receipts.
Optional levels are:
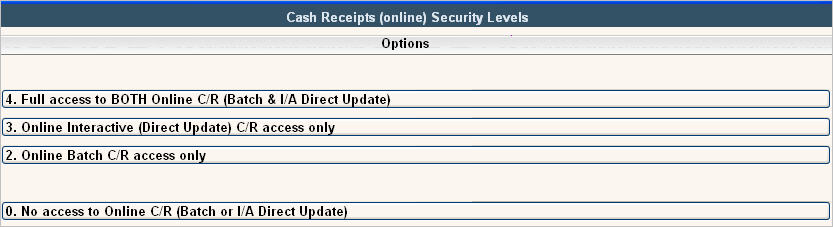
Cash Receipts (Online): this controls the options available in online cash receipts.
Optional levels are:
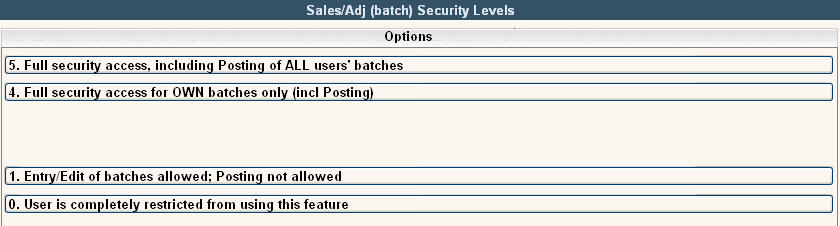
Sales Adjustment (Batch): this controls different options available in batch sales and adjustments.
Optional levels are:
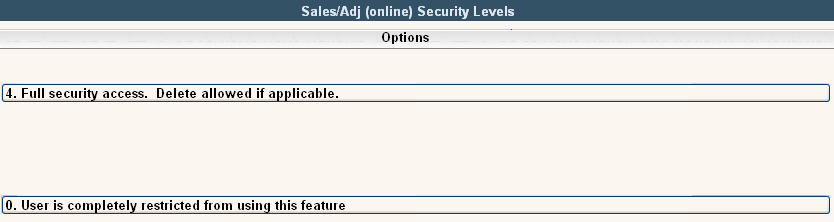
Sales Adjustment (Online): this controls the options available in online sales and adjustments; the user either has access to the online sales & adjustment screen or does not.
Optional levels are:
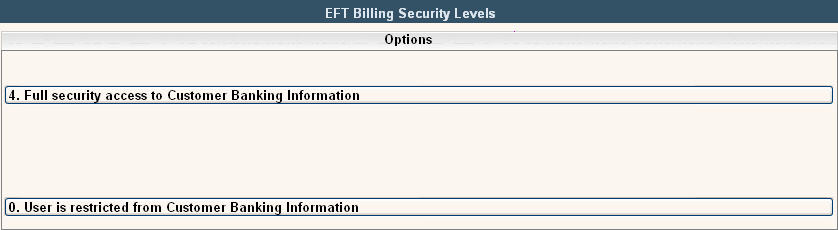
EFT billing: this controls the options available for EFT billing.
Optional levels are:
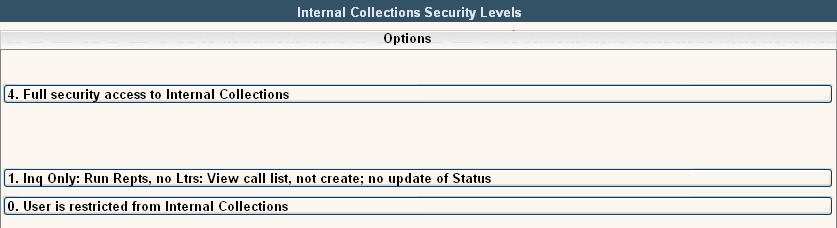
Internal Collections: this controls whether the user has access to internal collections or not.
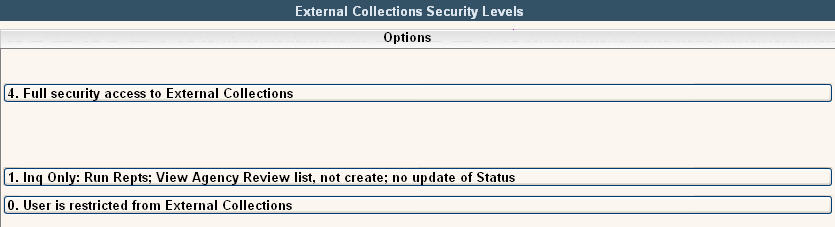
External Collections: this controls whether the user has access to external collections or not.
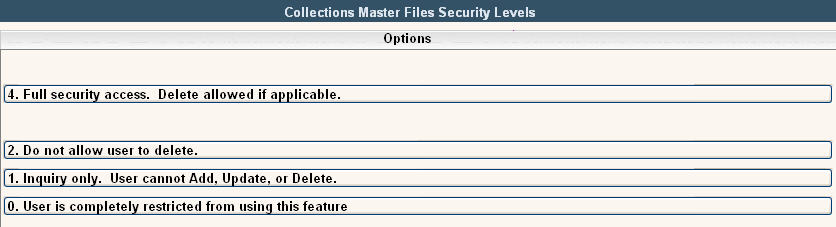
Collections Master Files: this controls the options available with collections master files. Optional levels are:
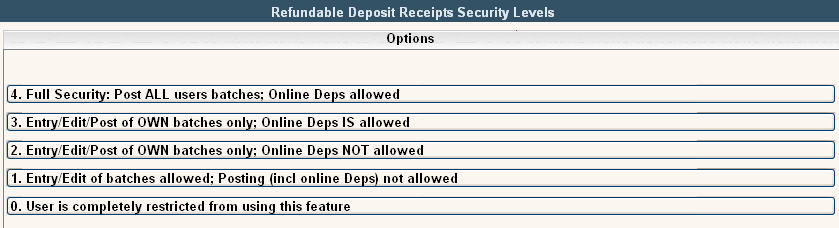
Deposit Receipts: this controls whether the user has access to the refundable deposit feature or not.
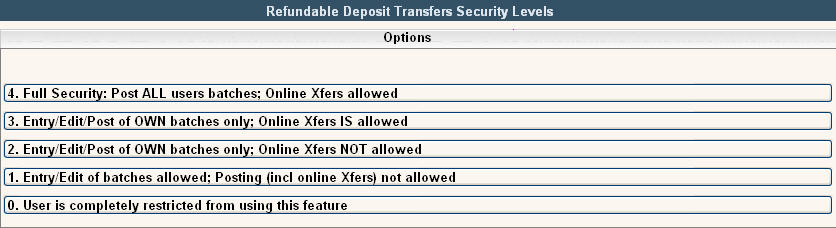
Deposit Transfers: this controls whether the user has access to the refundable deposit transfers feature or not.
Mass Credit Balance Refunds: this controls whether the user has access to the mass credit balance refunds feature or not.
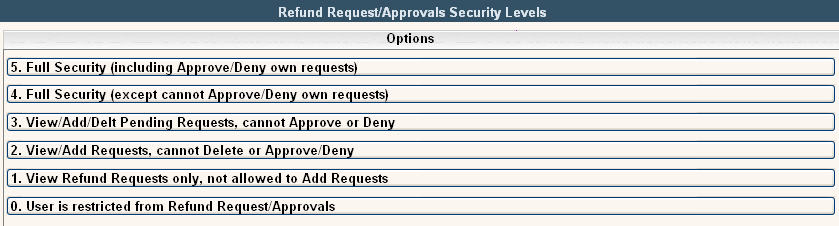
Refund Requests Review/Approval: this determines the user access for refund requests and approvals. Optional levels are:
Fill in this section with the appropriate choices - to allow access to the specific menu or feature. To grant access (yes) click on the boxes to put a ![]() - leave blank for no access.
- leave blank for no access.
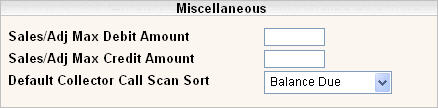
In the Sales/Adj Max Debit Amount, enter the maximum debit (charge) amount the user can enter in a single transaction.
In the Sales/Adj Max Credit Amount, enter the maximum credit amount the user can enter in a single transaction.
In the Default Collector Call Scan Sort, select the default sort order for how the Collector Call Scan is sorted. Options are:
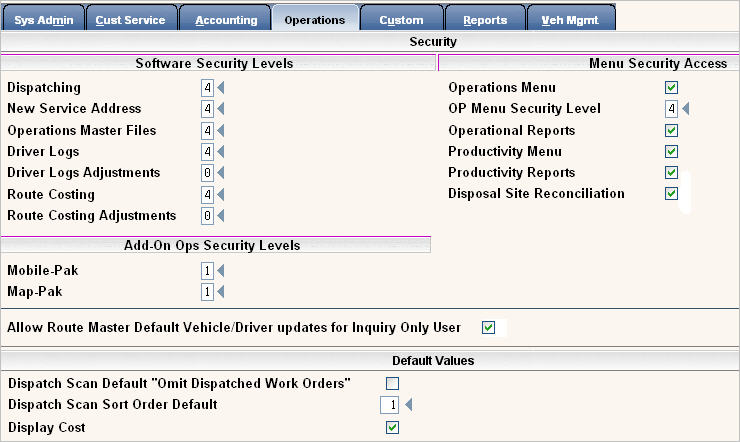
In this section, you can control IF the user has access to the specific program and if so, WHAT they can do within that section of the program. This works in conjunction with the menu security levels throughout user security. For each section of the software, click on the ![]() to display the levels of access available. The levels range from 0 (no access) to 4 (ALL access including delete); however, not all levels are valid in each section.
to display the levels of access available. The levels range from 0 (no access) to 4 (ALL access including delete); however, not all levels are valid in each section.
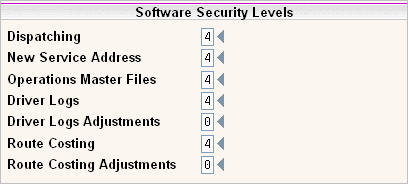
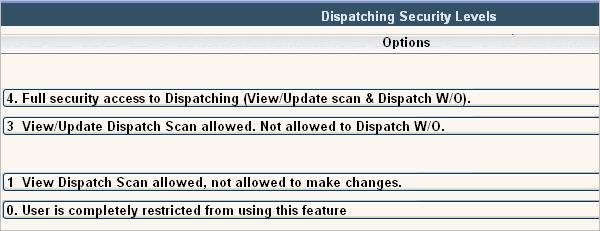
Dispatching: this controls whether the user has access to the Dispatching Screen from customer service or Operations. Option levels are:
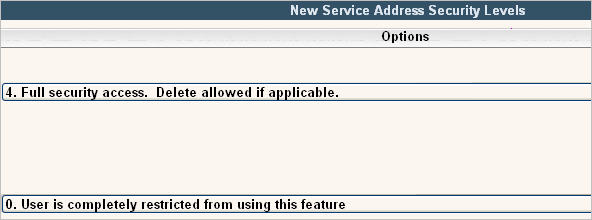
New Service Address: this controls whether the user has access to create a New Service Address from the Dispatching Screen. Option levels are:
Operations Master Files: this controls whether the user has access to the Operations Master Files. Option levels are:
Driver Logs: this controls whether the user has access to create, update or delete Driver Logs. Option levels are:

Driver Log Adjustments: this controls whether the user has access to create, update or delete Driver Log Adjustments. Option levels are:
Route Costing: this controls whether the user has access to create, update or delete Route Costing Files. Option levels are:
Route Costing Adjustments: this controls whether the user has access to create, update or delete Route Costing Adjustment Files. Option levels are:
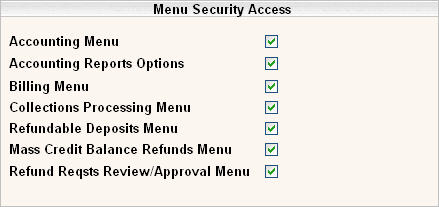
Menu Security Access
Fill in this section with the appropriate choices - to allow access to the specific menu or feature. To grant access (yes) click on the boxes to put a ![]() - leave blank for no access.
- leave blank for no access.
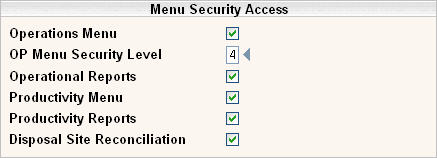
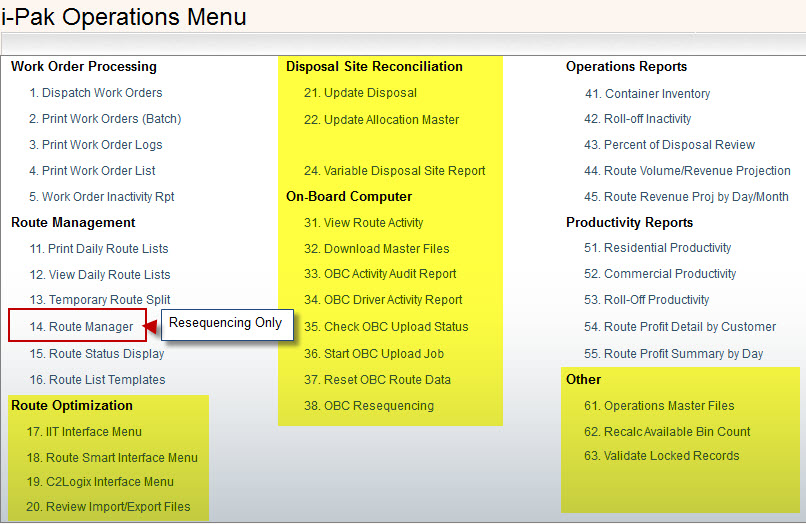
The OP Menu Security Level controls route manager access on the Operations Menu; if the user has access to the menu (option above OP Menu Security Level) this section will further define their access to and within route manager. Click on the ![]() to display the following options:
to display the following options:
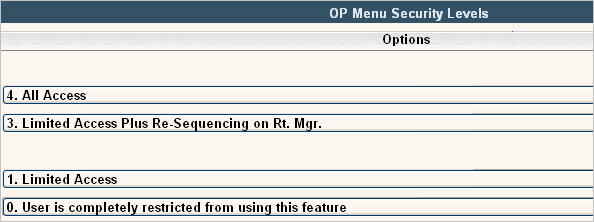
A user with Limited Access (1) will not have access to the highlighted options below.
The Add-On Ops Security Levels are for additional modules that must be activated. For more information on either of these modules, contact our sales department at 1-888-763-8725.

The Allow Route Master Default Vehicle/Driver Updates for Inquiry Only User flag provides one more level of security to the Operations Master Files. If a user is set up with Inquiry Only access (level 1) under Software Security Levels, Operations Master Files, and this field is checked YES ![]() , then the user will be allowed to go into the Route Master file and update any of the Vehicle and Driver fields. All other fields will remain protected. If the user has Inquiry Only access and this field is not checked (NO) then they will have no access to update the Route Master file.
, then the user will be allowed to go into the Route Master file and update any of the Vehicle and Driver fields. All other fields will remain protected. If the user has Inquiry Only access and this field is not checked (NO) then they will have no access to update the Route Master file.

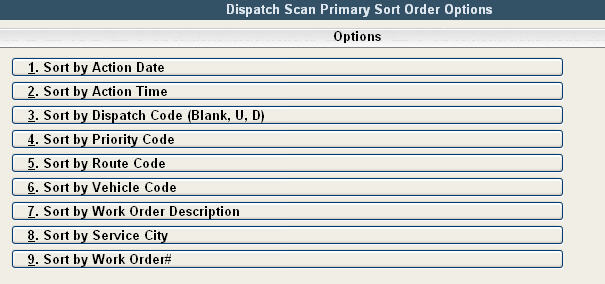
The Dispatch Scan Default "Omit Dispatched Work Orders" controls what will default into the On Line Dispatching selection screen for the field "Omit Dispatched Work Orders". The field can be changed if needed, this is just the option that will default on the screen when you first enter the Dispatching selection screen.
The Dispatch Scan Sort Order Default is another default in On Line Dispatching that controls the order that work orders will be displayed in. The sorting order can be changed, this just sets what the screen will start with.
Display Cost: this field controls whether vehicle, driver and disposal cost information is displayed when prompting on those master files; primarily in driver logs and route costing. Select yes by clicking in the box (![]() ) or leave blank to NOT display costing information for this user id.
) or leave blank to NOT display costing information for this user id.
In this section, you can control IF the user has access to the specific program and if so, WHAT they can do within that section of the program. This works in conjunction with the menu security levels throughout user security. For each section of the software, click on the ![]() to display the levels of access available. The levels range from 0 (no access) to 4 (ALL access including delete); however, not all levels are valid in each section.
to display the levels of access available. The levels range from 0 (no access) to 4 (ALL access including delete); however, not all levels are valid in each section.
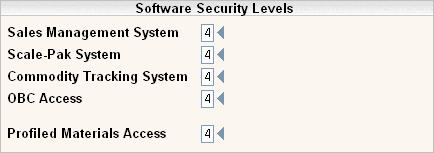
Sales Management System: if Sales Management has been purchased, select the appropriate level for the user.
Scale-Pak System: if Scale-Pak has been purchased, select the appropriate level for the user.
Commodity Tracking System: if using detailed purchase orders or commodity tracking, select the appropriate level for the user.
OBC Access: if On Board Computing has been purchased, select the appropriate level for the user.
Profiled Materials Access: if Haz-Pak and Scale-Pak have been purchased, select the appropriate level for this user to access Profiled Materials.
Menu Security Access
Fill in this section with the appropriate choices - to allow access to the specific menu or feature. To grant access (yes) click on the boxes to put a ![]() - leave blank for no access.
- leave blank for no access.
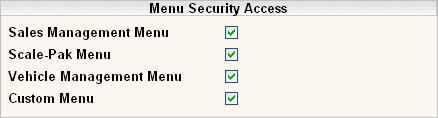
Sales Management Menu: if Sales Management has been purchased, this determines if the user has access to the Sales Management menu. Specific access within Sales Management is determined by the level selected (above).
Scale-Pak Menu: if Scale-Pak has been purchased, this determines if the user has access to the Scale-Pak menu. Specific access within Scale-Pak is determine by the level selected (above).
Vehicle Management Menu: if Vehicle Management has been purchased, this determines if the user has access to the Vehicle Management menu. Specific access within Vehicle Management is specified on the Vehicle Management tab.
Custom Menu: if there are any custom programs that require a menu for selection, this field determines if the user has access to the Custom Menu and custom programs.
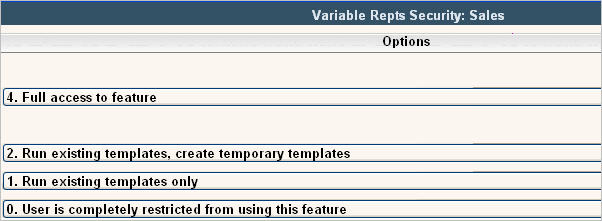
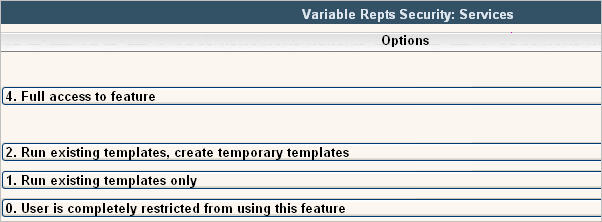
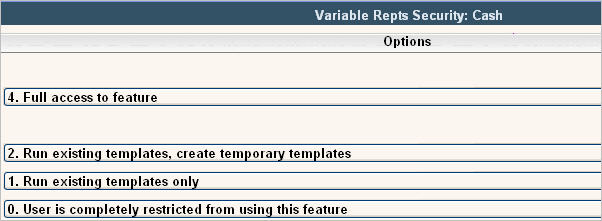
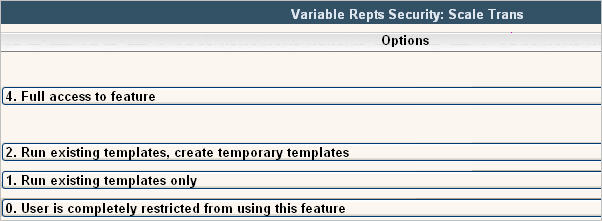
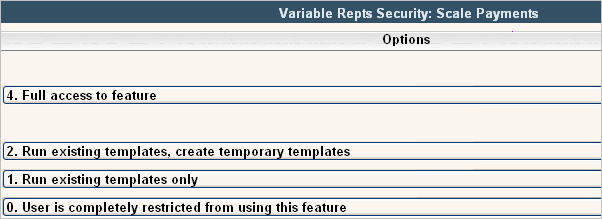
This section controls access to Variable Reports. Variable Reports give the user the ability to create their own 'ad hoc' reports based on their selection criteria. They can be set up as one time only reports or saved as templates to use more than once. Each report should be set up with a level the user has access to. An operations person may not be able to print a customer listing, etc.
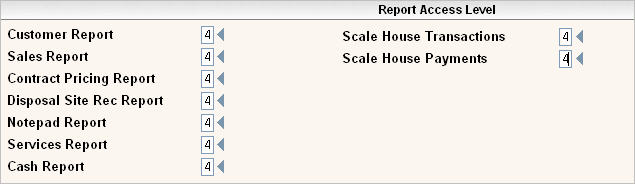
Customer Report: This controls access to the Variable Customer Report option found on the i-Pak Reports menu.
Sales Report: This controls access to the Variable Sales Report option found on the i-Pak Accounting menu.
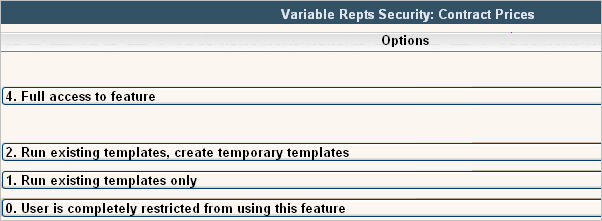
Contract Pricing Report: This controls access to the Variable Contract Pricing Report option found on the i-Pak Reports menu.
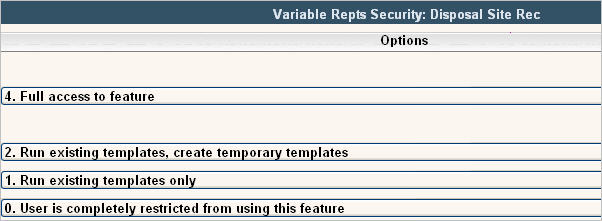
Disposal Site Rec Report: This controls access to the Variable Disposal Site Report option found on the i-Pak Accounting menu.
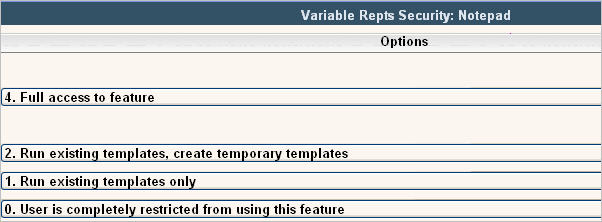
Notepad Report: This controls access to the Variable Notes Report option found on the i-Pak Reports menu.
Services Report: This controls access to the Variable Services Report option found on the i-Pak Reports menu.
Cash Report: This controls access to the Variable Cash Report option found on the i-Pak Accounting menu.
Scale House Transactions: This controls access to the Variable Transaction Report option found on the Scale House Management menu.
Scale House Payments: This controls access to the Variable Payment Report option found on the Scale House Management menu.
This section is only available if you have purchased Vehicle Management. Please contact our Sales Department at 1-888-763-8725 for more information and a demo of the product.